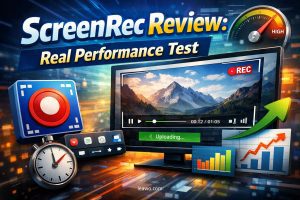
ScreenRec Review: Real Performance Test
Summary:
Should you choose ScreenRec for your screen recording tasks? This ScreenRec review explains everything you need to know about the interface, performance, quality, and more.
MenuCLOSE
Finding a suitable screen recorder is like an endless cycle of trial and error for us. No matter whether you are a student, a tech, or anyone who needs a balance of simplicity and performance, there are so many options like OBS, which is one of the best recorders for Mac, professional ones like Camtasia and Bandicam, etc. Among these, ScreenRec is famous for its one-click capture. But, does it really hold your high-quality recording task? Let’s find out.
Part 1: Why I Tried ScreenRec?
To be honest, I have spent a lot of time finding a good screen recorder, but it is hard to find a perfect one. Sometimes it makes the computer crash, and sometimes it is expensive. When I searched on the internet, I found many people mentioned ScreenRec, and many of them praised its performance: free, lightweight, simple, no watermark, etc., with commitment of only one click to record everything you need. Since it has a big user base, I figured it was finally time to see if it’s actually as smooth as everyone claims.
Part 2: Real Use Test
I tested it in didfferent using scnearios, from short videos to long screen captures. I want to know more than its feature list, but its actual performance. Now, I want to break it through based on the following aspects.
1. Setup & First Impression
The installer is only 437KB (on Windows), and the installation is quick and easy. The whole interface is modern and simple, with a black and white minimalist sidebar that doesn’t clutter your desktop. All the main buttons are where you want them to be, so that you can find the features you want easily.

2. Recording Process
Before recording, you can click on the gear button to change the directory folder in advance or save the file in the default folder (it has a dedicated View all the screen captures button). You can adjust some parameters, like recorded video quality. When you are ready, you only need to click on the feature button you need, and the screen gets darker with notes like left click and drag to screenshot or video. The whole process is simple without guessing, and I think it is simpler than most techy recording software programs.
3. Recording Quality
As for the actual footage, the quality is clear without much compression and pixelation. However, I noticed one thing: the free account user cannot choose the video quality, and there is only 720p. Obviously, that’s enough for instant recording or daily tasks. But if you need higher, like 1080p or 4K, you need to upgrade your account and pay some fees. As a free recorder, its quality is absolutely good, but you may need to decide if 720p is enough for your special project.

4. Performance & System Impact
While recording, I made sure to keep heavy software programs like Chrome and Photoshop to see if it would make the computer crash. To my surprise, everything ran smoothly without any lag or freezing, and the mouse cursor didn’t stutter at all. And I check the system task manager, the occupied CPU is less than 1%, which is a huge relief if you need to record tutorials for demanding software.

5. Saving & Sharing Experience
After you finish recording, the file will be saved in your gallery automatically. You can manage all your captures here. From the thumbnail, the Get Shareable Link feature upload your recorded file and copy the video link to the clipboard, which you can paste and send to any of your friends to check. However, this feature is only accessible to registered users. If you are a visitor, you can not link share to your friends. Meanwhile, the cloud storage is limited as well to only 2GB for free users, unless you upgrade your account.

Part 3: What I Liked and What I Didn’t Like
After using this software for some time, I found that it is good at some points but falls short in others. To give you a comprehensive perspective, I also looked into comments from other users. Here are my pros and cons to help you decide if ScreenRec truly fits your needs.
|
What I Liked |
What I Didn’t Like |
|
-Small and light software that doesn’t drag your computer down. |
-Limited features for free users, for example, the higher quality, highlighting the cursor features, need to be paid for. |
Part 4: Who Is It Good for?
This software is more likely suitable for people who have basic recording needs. If you record occasionally, like a quick “how-to” for a friend, the simplicity is a huge advantage. It is especially useful for students or office workers who need to share quick visual updates or feedback without worrying about high-end production value. Simply put, if you need advanced editing and recording, ScreenRec is not enough.
Part 5: An Alternative I Have Tested to ScreenRec
While ScreenRec is a good choice for quick and occasional recording, the 720p and no editor is not for me, at least. If you are like me and want something more powerful, yet free, then I recommend Leawo Free Screen Recorder. It is one of the most versatile screen recorders for Windows I’ve tested. You get everything equivalent from it, and even better. Let’s see what it can do:
Key Features of Leawo Free Screen Recorder
- 4-in-1 Recorder: You get a screen recorder, webcam recorder, sound recorder, and screenshot capture in one program. Plus, there is even an online recorder you don’t really need to install.
- 4K Support: You get up to 4K video quality if the graphics card allows, and the original video supports, and you don’t need to pay anything.
- Real-time Drawing: During recording, you can freely draw to annotate your screen, highlight important areas, or add shapes.
- No Hidden Costs: You get access to professional features like task scheduling and mouse click effects without having to upgrade to a premium account.
- Multiple Audio Sources: You can record system sound, your microphone, or both at the same time for perfect voiceovers.
It is simple to use. Let’s start using it by following the guide below:
Step 1: Open the software, enter settings to change the saving directory.
Step 2: Click the task you need, like Record Screen. Choose full screen or select window, fixed region, or recently used size.

Step 3: You can decide whether to record the system sound, the microphone sound, or turn on the webcam. You can also set the time length and the task schedule on this page.

Step 4: When done setting, click on the red REC button to start. It will count 3,2,1 and start to record your screen. You can add annotations you want by clicking on the note button. If you want to stop, click the square stop button at any time.

Part 6: Final thoughts
Overall, ScreenRec is a handy tool for screen recording. You don’t need a learning curve to use it, and it is reliable for simple tasks. However, for an advanced user like me want to enjoy free and powerful features, I would like to turn to Leawo Free Screen Recorder for 4K free quality, task scheduling, time length setup, editor, and more. It really comes down to whether you want basic usage or high-quality control. If you are hesitant, just download them both to find out which one is good for you.
-

ScreenRec Review: Real Performance Test
-
Best Ways to Watch YouTube Videos Offline Without Internet
-
How Many People Can Share a Netflix Account?
-
5 Proven Methods to Watch YouTube Without Ads
-
How Long Do Recordings Stay on YouTube TV? Full Breakdown
-
AnyBurn Review: Is This Free Burner Enough
-
3 Best Ways to Download All Videos from YouTube Channel
-
DVDFab DVD Creator Review: Read Before Buying
-
Windows Media Player Review: Is It Working on Windows 11?
-
6 Best Tools to Download YouTube Playlist Fast


-
Best Twitter Porn Accounts You Shouldn’t Miss
-
How to Download Pornhub Videos? Ways to Download from Pornhub
-
Top 5 OnlyFans Viewer Tools to View OnlyFans Content for Free
-
Full Review of Savethevideo: Is Savethevideo Safe & How to Use it?
-
How to Download MissAV Porn Videos in HD for Offline Viewing?
-
Netflix Download Limit: What it is & How to Avoid
-
Full Guide to YouTube Members Only Videos: Watch, Download
-
How to Import Bookmarks from Safari to Chrome
-
How to Download Videos from Fansly with Fansly Downloader
-
4 Methods to Burn ISO Files to Blu-ray Discs Easily