Summary:
This article explains in detail the definition and working principle of YouTube TV DVR, breaks down its core functions and usage methods, analyzes its many limitations, and provides a specific solution to remove these limitations by using CleverGet Recorder.
MenuCLOSE
As a long-time user of live TV streaming services, I know all too well the regret of missing favorite shows and events. However, the DVR function of live TV has saved our viewing experience. Does YouTube TV have DVR? Yes. Before delving into YouTube TV DVR, let’s briefly understand the general situation of live TV DVRs. Its core function is to help users record live TV programs, movies, sports events, and other content for convenient viewing at their leisure. Most of them utilize cloud storage, eliminating the need for additional set-top boxes or hard drives, making them more flexible to use. Currently, the mainstream live TV DVR services on the market, besides YouTube TV DVR, include Sling TV DVR and Hulu + Live TV DVR. Sling TV DVR emphasizes cost-effectiveness, while YouTube TV DVR’s biggest highlight is free unlimited storage.

What Is YouTube TV DVR?
If this is your first time using YouTube TV, you might be unfamiliar with its DVR feature. Actually, YouTube TV DVR is a cloud recording function built into YouTube TV. And, as long as you subscribe to any YouTube TV plan, you can use this service for free. The core function of YouTube TV DVR is to record live programs, sports events, movies, and other content you’re interested in and store it on a cloud server, allowing you to watch it anytime, anywhere, on any device.
Compared to traditional DVRs, YouTube TV DVR has fundamental differences. Firstly, YouTube TV DVR uses pure cloud storage, not occupying local device space, and offers unlimited storage. Secondly, the recorded content is stored in the cloud. As long as you log into your YouTube TV account, you can view and play the recorded content anytime, whether using a mobile phone, tablet, computer, or smart TV. Finally, YouTube TV DVR requires no additional equipment purchase or recording fees. You can use it for free simply by subscribing to a YouTube TV plan.

Key Features of YouTube TV DVR
While using YouTube TV DVR, I found it to be very powerful. The most core and practical functions of YouTube TV DVR include the following:
Unlimited Storage
This is YouTube TV DVR’s most competitive feature, and my favorite feature. YouTube TV DVR doesn’t limit the amount or size of recorded content. Whether it’s TV dramas, movies, sports events, or news programs, you can record as much as you want. Even more surprisingly, we don’t need to worry about insufficient storage space. YouTube TV DVR offers unlimited storage. You no longer need to painfully delete your favorite old content to record new shows. You also don’t need to bother calculating remaining storage space; just record what you want to watch.
Record Multiple Shows at Once
We probably had this experience: multiple favorite shows or events are broadcasting at the same time, but we hesitate about which to watch first, worried about missing any of them. YouTube TV DVR supports recording any number of shows simultaneously. No matter how many shows are broadcasting live at the same time, it can record them all. When I have free time, I can watch them one by one. This ability to record multiple shows simultaneously is uncommon among similar DVR services, making YouTube TV DVR particularly user-friendly.
Cloud-Based Access
YouTube TV DVR uses cloud storage technology, meaning its recordings are not dependent on any specific device. As long as you’re logged into your YouTube TV account, you can access and play your recordings on any YouTube TV-enabled device.

How to Use YouTube TV DVR
So, how do you use a YouTube TV DVR? Just follow these steps, and you can easily record and watch programs:
Step 1: Log in to your YouTube TV account
First, access YouTube TV and log in to your YouTube account. Make sure you have a YouTube TV subscription; otherwise, you won’t be able to use the DVR feature.
Step 2: Find the Show You Want to Record
After logging in to your YouTube account, you need to find the show you want to record. Click the “Live” section on the homepage to browse currently streaming and upcoming shows.
Step 3: Start Recording
Once you find the target show, click on the show’s cover image or name to enter the show’s details page. Then click the “+” button next to the show’s name. A notification will pop up informing you that the show has been added to your media library and recording will begin automatically.

YouTube TV DVR Limits
While YouTube TV DVR is powerful and easy to use, it also has some limitations. These limitations may affect our user experience. Based on my experience and official rules, the main limitations of YouTube TV DVR are as follows:
1. Limited Retention Period
This is the most obvious limitation of YouTube TV DVR. While it offers unlimited storage, all recorded content is only retained for 9 months, starting from the day it was recorded. After this period, the recorded content is automatically deleted and cannot be recovered.
2. Offline Viewing with Conditions
YouTube TV DVR’s recorded content is stored in the cloud. Therefore, this content can only be viewed on the YouTube TV app or web browser. It cannot be exported to a local device or shared with people who don’t have a YouTube TV account. Although offline downloads are supported on mobile devices, downloaded content can only be viewed within the YouTube TV app and cannot be transferred to other players.
3. Dependent on YouTube TV Subscription
YouTube TV DVR is an add-on feature to YouTube TV plans and cannot be used independently. You must subscribe to any YouTube TV plan to use it for free. If your subscription expires and is not renewed, or if you actively cancel your subscription, the DVR function will immediately become unavailable, and you will no longer be able to record new programs.
How to Remove YouTube TV DVR Limits
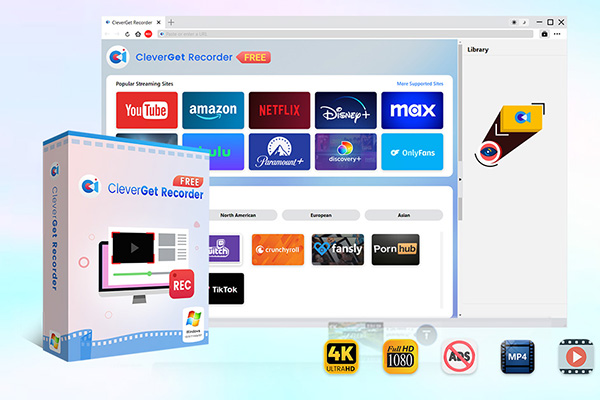
Many users feel helpless in the face of the limitations of YouTube TV DVR. Actually, we can use third-party recording tools to bypass these limitations. CleverGet Recorder is a very useful tool. CleverGet Recorder is a free streaming video recording tool. It supports recording content from almost all major streaming platforms, including YouTube TV, Netflix, Disney+, Hulu, etc. Here are CleverGet Recorder’s core advantages:
1. Wide Compatibility
As a free streaming video recording tool, CleverGet Recorder supports recording content from almost all major streaming platforms, and can even capture DRM-encrypted streaming video.
2. Local Permanent Storage
CleverGet Recorder can save recordings as local MP4/MKV files for permanent storage. Recordings are not subject to the 9-month retention period of YouTube TV DVR.
3. No Subscription Dependency
CleverGet Recorder does not rely on a YouTube TV subscription. As long as you can play YouTube TV content, CleverGet Recorder can record it.
4. Free and Unrestricted
CleverGet Recorder is completely free to use and has no time limit.

-
Professional and free streaming video recorder to record online on-demand video and live streaming video without quality loss and cost. Schedule recording upon preset length and skip ads upon preset ad filter. Save recordings to MP4/MKV file for unlimited offline viewing.
Here are the specific steps on how to record on YouTube TV by using CleverGet Recorder:
Step 1: Download and install CleverGet Recorder on your computer. After installation, launch CleverGet Recorder.Step 2: After launching CleverGet Recorder, click the “Settings” button on the software interface to enter the settings page. You can adjust the recording parameters according to your needs, such as setting the output format, resolution, and recording speed. After setting, click “Save” to complete the parameter configuration.Step 3: In CleverGet Recorder’s built-in browser, visit the YouTube TV website. Then, log in to your YouTube TV account. Find the YouTube TV program you want to record and click “Start Playback.” The software will automatically detect the playing video.Step 4: After the video starts playing, click the “REC” button on the software interface. CleverGet Recorder will then begin recording the playing YouTube TV program.
Conclusion
Through the detailed explanation above, you should now have a comprehensive understanding of YouTube TV DVR. It’s a powerful and user-friendly cloud recording tool. Of course, YouTube TV DVR also has some limitations. Fortunately, we can easily remove these limitations using the free tool CleverGet Recorder. CleverGet Recorder records YouTube TV content as local files, permanently saving and allowing for free playback. Hopefully, this article has helped you better utilize YouTube TV DVR and enjoy a more convenient and free viewing experience.
-
YouTube TV DVR Explained: How It Works, Limits, and Tips
-
4 Easy Methods: How to Download Reddit Videos?
-
How to Watch Movies with Friends Online Together?
-
Cyberlink PowerDVD Review: Best Paid Media Player?
-
ScreenRec Review: Real Performance Test
-
Best Ways to Watch YouTube Videos Offline Without Internet
-
How Many People Can Share a Netflix Account?
-
5 Proven Methods to Watch YouTube Without Ads
-
How Long Do Recordings Stay on YouTube TV? Full Breakdown
-
AnyBurn Review: Is This Free Burner Enough


-
Best Twitter Porn Accounts You Shouldn’t Miss
-
How to Download Pornhub Videos? Ways to Download from Pornhub
-
Top 5 OnlyFans Viewer Tools to View OnlyFans Content for Free
-
Full Review of Savethevideo: Is Savethevideo Safe & How to Use it?
-
How to Download MissAV Porn Videos in HD for Offline Viewing?
-
Netflix Download Limit: What it is & How to Avoid
-
Full Guide to YouTube Members Only Videos: Watch, Download
-
How to Import Bookmarks from Safari to Chrome
-
How to Download Videos from Fansly with Fansly Downloader
-
4 Methods to Burn ISO Files to Blu-ray Discs Easily