How to Screen Record on Windows 10/11 for Free
In 2025, there are many occasions when you need to record on Windows. From Zoom meetings to epic gameplay and streaming TV shows. So can you record on Windows? How to screen record on Windows for free? The answer is positive. You can capture your screen on Windows with the native screen recording software or a third-party screen recorder. In this blog, we will illustrate how to screen record on Windows 10/11 with 3 helpful methods. Just make sure to read on.
Outline
Part 1: How to Screen Record on Windows 10/11
Recording on Windows is pretty straightforward, as long as you use the right tool. In this part, we will introduce how to record on Windows 10 with the pre-installed screen recording features.
1. How to Screen Record on Windows 10/11 with Xbox Game Bar
Xbox Game Bar is a useful tool designed for recording gameplay on Windows originally. Today, the feature is prebuilt into Windows 10/11, which allows you to take a screenshot or record videos, audio, and your webcam easily.
With Xbox Game Bar, you can record on Windows with up to 1080p resolution. It also offers a few basic editing features that let you further polish your recordings. You can also trim, add text, and share clips and screenshots directly. Just check out how to screen record on Windows with Xbox Game Bar in simple steps.
Step 1: Launch Xbox Game Bar
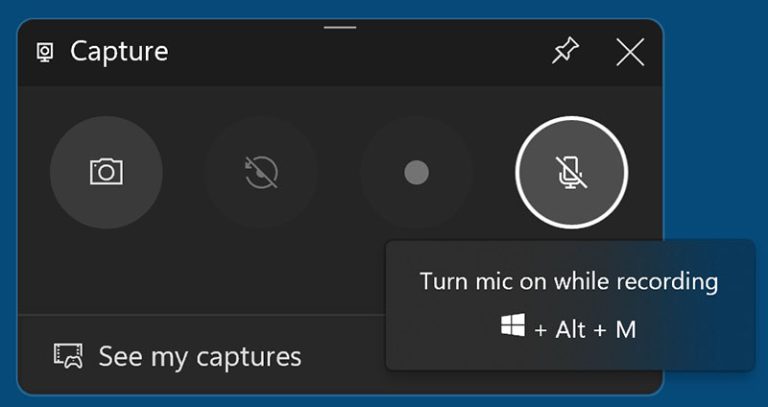
Press the keyboard shortcut Win + G to open the Xbox Game Bar. A control panel will appear instantly. Choose the screen capture option to record on Windows.
Step 2: Set audio input
The Xbox control panel allows you to take a screenshot or record your screen. Click on the Record Mic option to set the audio input. This allows you to narrate or add live commentary during screen recording.
Step 3: Start recording
Click on the bright Recording icon to start recording on Windows. Click on the Stop icon on the recording timer or the one in the Game Bar menu to stop recording at any time.
All screen captures are automatically stored as MP4 files, which are located in the videos folder. You can find your screen recordings by going to the folder Videos > Captures.
2. How to Screen Record on Windows 11 with the Snipping Tool (Alternative)
Alternatively, the Snipping Tool on Windows 11 also allows you to capture or record your screen easily. (Note: Windows 10 does not support the recording function. It can only be used to capture screenshots. )Here’s how to screen record on Windows 11 with Snipping Tools.
Step 1: Launch the Snipping Tool
Go to the Start menu and search for the Snipping Tool using the search box.
Step 2: Adjust settings
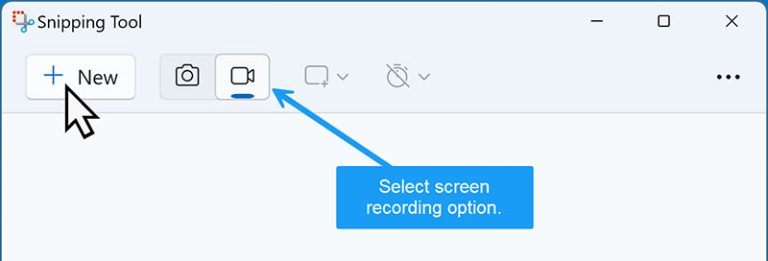
Click on the Record icon to enter the recording mode. If you want to record a portion of your screen, draw a rectangle over the area.
Step 3: Start Recording
Press Start after selecting the desired area of your screen. You will see a 3-second countdown before recording. Click on the Stop button once you are done.
Your screen recording will be automatically saved in the Videos folder by default.
>
- Although you can record videos with the snipping tool on Windows 11, the videos you recorded are most likely to be soundless. It may be the bug of the snipping tool. If your aim is to record a screen on Windows 11 with audio, you can turn to some best free screen recorders. We will recommend one helpful tool in the next part.
Part 2: How to Screen Record on Windows Without Xbox Game Bar/Snipping Tool
How to Screen Record on Windows 10/11? The previous part has illustrated the native methods. While Xbox Game Bar and the Snipping tool are enough for quick recording, there are limitations as follows:
○ Xbox Game Bar lets you record the full screen or a specific window but it can’t record a specific region of the screen.
○ You can’t trim, cut, or add effects to your recordings with the Snipping Tools.
○ Whether for the Xbox Game Bar or the Snipping Tools, MP4 is the only output format.
○ Some users complain about slow performance when they are recording.
So, how to screen record on Windows without the limits of Xbox Game Bar or the Snipping Tool? It’s easy. You can get around the restrictions with Leawo Free Screen Recorder and PowerPoint. Just read on to learn more.
1. How to Screen Record on Windows with Leawo Free Screen Recorder
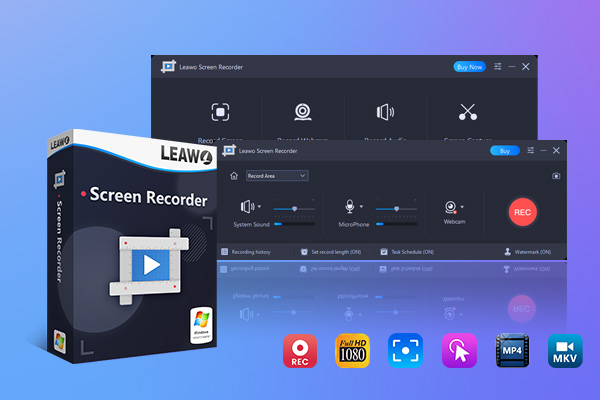
With sophisticated features, Leawo Free Screen Recorder is a top-notch screen recorder that allows you to capture all your computer activities with the highest quality possible. You can record anything, from streaming movies to TV shows to meetings to gameplay and even yourself in the webcam. Most impressively, it’s also 100% free to use!
Highlighted features of Leawo Free Screen Recorder
○ Record video in 4K HD quality
With the Leawo Screen Recorder, you can capture videos in 4K HD quality (if graphics cards are supported). Whether you want to screen record movies and TV shows from streaming services, video games, or meetings, the screen recorder can export recordings with premium video quality.
○ Record any region on Windows
With Leawo Screen Recorder, you can record your screen by selecting the area you want to record. There are various options for recording, such as full screen, selected region/window, fixed region, recently used size, etc.
○ Record screen & webcam with audio
Leawo Screen Recorder supports screen and webcam recording separately or simultaneously. You can screen record on Windows with audio (system audio and mic input) at the same time.
○ Additional editing features
The additional features for recording and video editing are impressive. You can add audio narration, watermarks, and mouse click animations to your recordings. It also allows you to schedule recording and set recording duration for more convenience.
○ Easy to take screenshots
Leawo Screen Recorder also supports screenshots. You can instantly capture screenshots with the shortcut controls and export them to high-quality images.
With the powerful features above, the Leawo Screen Recorder is the best solution for screen recording.
Here’s how to screen record on Windows 10/11 with it easily.
Step 1. Download Leawo Free Screen Recorder
You can download Leawo Screen Recorder for free and then install it on your computer by clicking the link below.

-
Leawo Free Screen Recorder
– Support Windows 7/8/8.1/10/11.
– Provide various doodle and annotation tools for free.
– Support to record online class, PowerPoint presentation, and zoom meeting.
– Smoothly record gameplay in high quality, including large 3D games.
– Add background music or voiceover to video.
– Integrate more advanced functions like real-time drawing, scheduled recording, shortcut controls, etc.
Step 2. Set output preferences
Click the three-bar icon in the top right corner. Go to Settings > Output to set the output preferences, including the output directory, frame rate, sample rate, video encoder, video format, etc.
Step 3. Set Recording Region
On the main screen, click the Record Screen button. Define your recording area: full screen, a selected region, a custom region, or recently used aspect ratios.
Step 4. Start Recording
Click the REC button to screen record on Windows 10/11 for free.
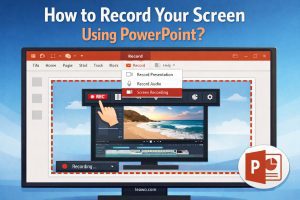
2. How to Screen Record on Windows with PowerPoint
Do you know you can even record your screen with PowerPoint? The software has a built-in screen recording feature that lets you capture your computer screen easily. The recording will be embedded in your slides and you can also save the recording as a separate file. Here’s how to screen record on Windows with PowerPoint.
- Please note that the built-in screen recording feature in PowerPoint is free only when you have Microsoft 365 or Office 2019 (or newer versions) purchased. If you don’t have either one of them, you can’t use the function.
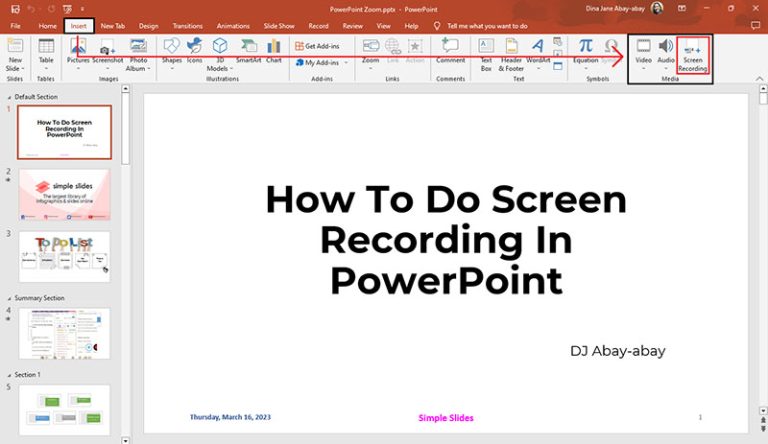
Step 1. Open your Microsoft PowerPoint. Navigate to the Insert tab. Select Media > Screen Recording.
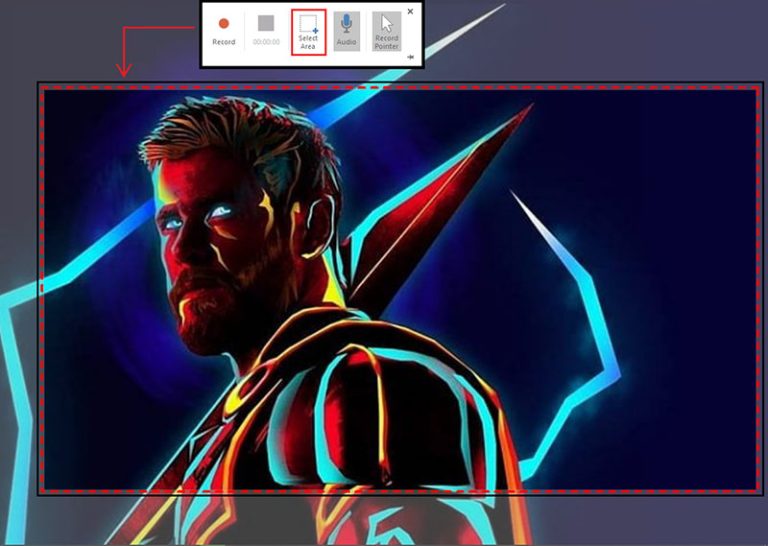
Step 2. A control widget will pop up. You can record the entire screen or click on the Screen Area if you want to record part of your screen.
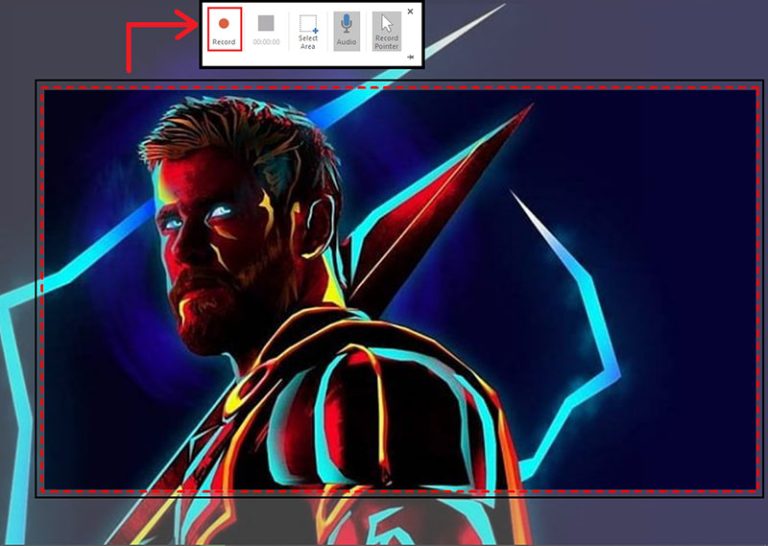
Step 3. Once you select the area, click on the Record button to initiate the PowerPoint screen recording.
Part 3: The Comparison of Screen Recording with Xbox Game Bar, Microsoft Powerpoint, and Leawo Free Screen Recorder
Now you know how to screen record on Windows 10/11 with 3 useful methods. So what are the differences and which one is better? Just check out the comparison to learn more.
| Xbox Game Bar | Leawo Free Screen Recorder | PowerPoint | |
|---|---|---|---|
| Ease of Use | √ | √ | √ |
| Supported output format | MP4 | MP4 | MP4 |
| Record Video | √ | √ | √ |
| Record Audio | √ | √ | √ |
| Records Webcam | √ | √ | √ |
| Recording Mode | Full screen, window | Full screen, selected region/window, fixed region, recently used size | Full screen, selected region |
| Output Quality | Up to 1080p | Up to 4K | Up to 1080p |
| Screenshot | √ | √ | √ |
| Video Editing | basic editing | Add audio narration, real-time drawing, mouse click effects | × |
| Additional features | × | schedule recording, set recording duration | × |
| Cost | Free | Free | Free only with Microsoft 365 or Office 2019 or newer |
Part 3: Conclusion
This blog has introduced how to screen record on Windows for free. While the native screen recording features are convenient enough, their limitations are rather obvious. PowerPoint is also a handy tool, but the recording quality can’t be guaranteed. That’s why you should consider Leawo Free Screen Recorder instead. The recorder is powerful and professional, which can help you capture all your computer activities for free. Just see it yourself.
