How to Record Facebook Live on Windows, Mac, iPhone, and Android

Summary:
- This guide walks you through simple methods to record streams on Windows, Mac, iPhone, and Android so you can save them to watch anytime.
We know Facebook Live is a great way to share real-time content. After the stream ends, you may or may not be able to rewatch it, depending on whether the creator saves the replay. Sometimes, you just want to share it with others, or you just want to save it to watch later, but Facebook doesn’t provide a built-in option to directly record or download live streams from other users or pages. However, that doesn’t mean that you can’t capture Facebook Live to view later. In this article, I am going to show you how to record Facebook Live safely and with ease on Windows, Mac, iPhone, and Android.
OutlineCLOSE
How to Record Facebook Live on Windows
Let’s begin with how you can record Facebook Live on Windows first. To record on Windows, you need a reliable and stable screen recorder to record Facebook Live streaming. For this task, I recommend you to use a free and very reliable recorder like Leawo Free Screen Recorder for this purpose. The Leawo screen recorder is light, easy to use. This recorder can record high-quality video and audio without watermarks easily. One of the unique features of this software is that you can record long livestreams easily and export them in other formats, such as MP4. This way, you can both play and share the content with others. Below is a step-by-step guide:
Step 1: First, go ahead and download and install Leawo Free Screen Recorder on your PC.

-
- Support to record gameplay at up to 4K without watermark.
- Provide various doodle and annotation tools for free.
- Add background music or voiceover to video.
- Output files in MP4/MP3/JPG formats.
- Integrate more advanced functions like real-time drawing, scheduled recording, shortcut controls, etc.

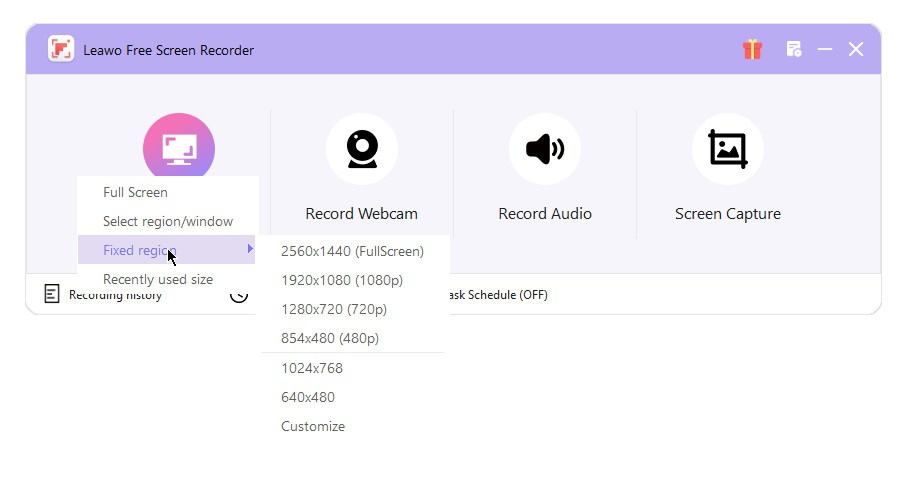
Step 2: Now in the main interface, go ahead and choose the Record Screen option from the main interface.
Step 3: Go to Facebook and play the Live video you want to record.
Step 4: In Leawo, you can adjust the recording area by dragging the frame over the Facebook Live video window.
Step 5: Also, make sure to turn on the system audio to record the stream sound. If you want to voiceover, then you can also enable the microphone.
Step 6: Once all is done, press the Start Recording button.
Step 7: Now open the Facebook Live that you want to record. The recording software will run in the background.
Step 8: Once finished, press the Stop button. The recording will be saved as an MP4 file.
How to Record Facebook Live on Mac
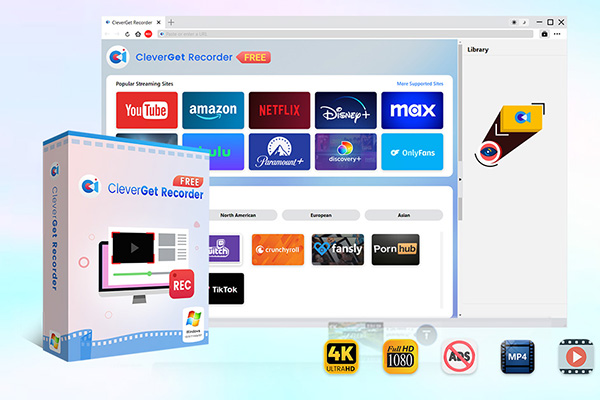
For Mac, you will also have to use a third-party application. To record Facebook Live on a Mac, you can use the freeware CleverGet Recorder. It is a free tool that can record video in HD as well as 4K. This tool is perfect for recording livestreams in high definition. It’s easy to install, doesn’t get slow during long recording sessions, and can record the audio without quality loss. Steps below will help you know how to use it:
Step 1: First, download and then install CleverGet Recorder on your Mac.
-
- 100% free streaming video recorder.
- Record both online on-demand and live streaming videos.
- Record up to 4K 60 FPS video to MP4 or MKV.
- Schedule recording on preset recording length.
- No watermark, no time limit, and ad-skipping (beta).
Step 2: Now open the application and choose the Screen Recorder option.
Step 3: Next, visit Facebook in your browser and play the Live video you wish to record.
Step 4: Click the red REC icon near the address bar. There will be a toolbar showing up at the bottom. You can adjust ad filter and recording scheduler.
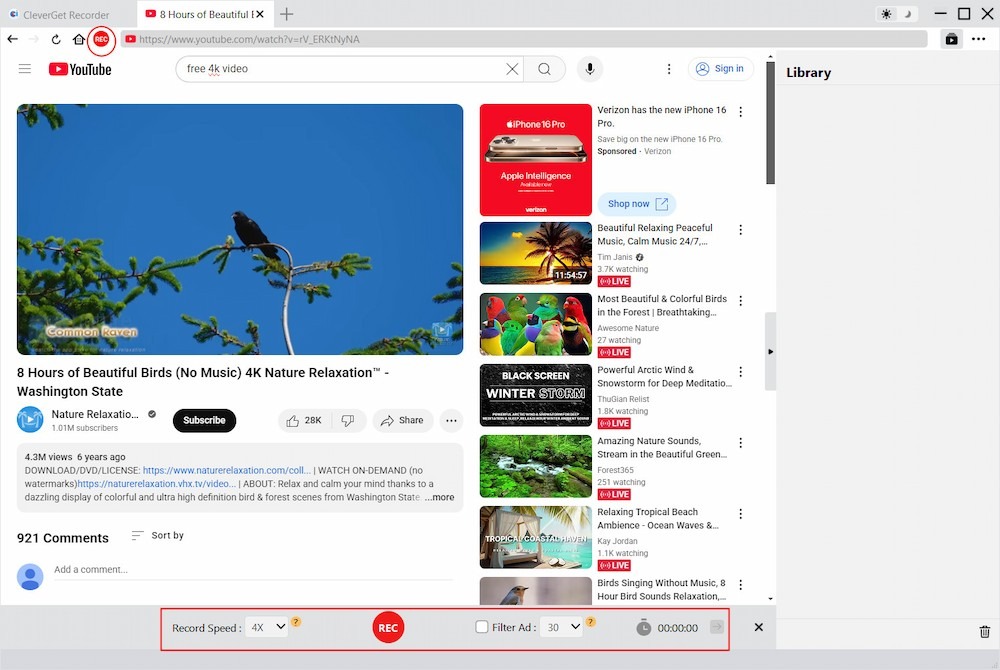
Step 5: After selecting, click the REC button to begin recording.
Step 6: Once the stream ends, press Stop Recording. CleverGet will save the file automatically on your Mac, which you can rename and organise.
How to Record Facebook Live on iPhone
No need to download any third-party apps if you are an iPhone user. You know that iOS has a native Screen Recording feature. And with this handy tool, recording a Facebook live will be easier. The only thing is that you need to add the recorder to your Control Centre and start recording while watching Live.
Step 1: To begin the process, go to Settings > Control Center on your iPhone.
Step 2: If your screen record feature is not already in the Control Center, then tap Customise Control and add Screen Recording by tapping the + icon.
Step 3: Once you have made changes, swipe down from the top-right corner of your iPhone to open the Control Center.
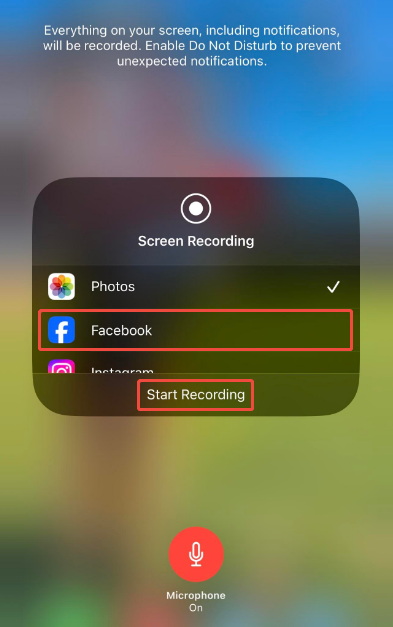
Step 4: Next, tap and hold the Record button. A menu will appear showing save destinations.
Step 5: Choose Facebook, and click “Start Recording”.
Step 6: When you’re done, tap the red button to stop recording. The video will be saved automatically in your Photos app.
Also Read: 130+ Bios for Facebook | 5 Facebook Story Viewers | Best Facebook Video Downloaders for PC
How to Record Facebook Live on Android
Like iPhones, most modern Android phones (Android 10 and above) include a built-in screen recorder. This feature makes it very easy to capture Facebook Live videos without extra apps.
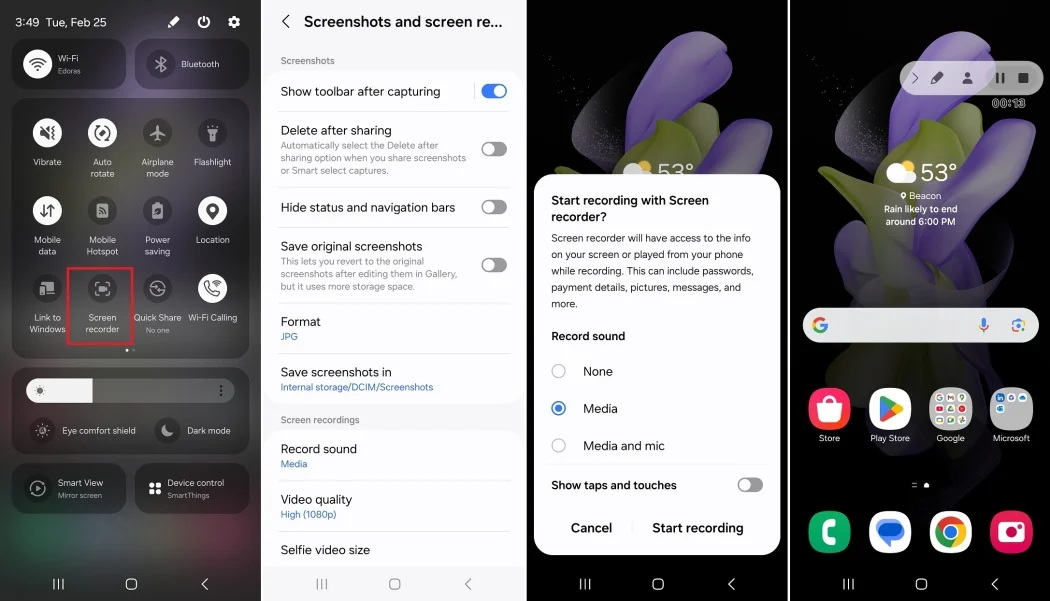
Step 1: First, access the Quick Settings panel.
Step 2: Here, you need to find the Screen Recorder option (click the edit icon to add it if you don’t see it).
Step 3: Select Screen Recorder, and you can verify settings like audio or quality, etc.
Step 4: Now open your Facebook app and watch the Live stream you wish to record.
Step 5: The recording process will begin, and it will start recording both video and audio.
Step 6: Once done, tap the Stop button. Now your recording will automatically be saved in the Gallery or Photos app.
For advanced features, you’ll need to use third-party recorders. Here takes Mobizen Screen Recorder as an example, which is free and simple to use, and supports HD recording with clear audio.
Step 1: Download and install Mobizen Screen Recorder from the Google Play Store.
Step 2: Once installed, a small overlay menu from Mobizen will display on the side of your screen.
Step 3: Now open the Facebook Live video you wish to record.
Step 4: Once started, click on the camcorder button to start recording.
Step 5: After the recording is done, choose Stop.
Conclusion
No doubt, Facebook Live is the best way to engage with audiences. However, we know once a broadcast ends, downloading and rewatching it isn’t easy at all, just like Facebook private video downloads. For such a time, recording on Facebook Live is the best option. To do this, on Windows, you can use software such as Leawo Free Screen Recorder. For Mac, you can use CleverGet Recorder for HD HD-quality recording. For iPhone, there’s the native Screen Recording feature that can be easily used, and for Android, you can use the native recorder or third-party software like Mobizen Screen Recorder. These methods make sure recording Facebook Live is not as hectic as it seems.
Share this post