If you have plenty of photos stored in iPhone photo library, you can transfer them to Mac computers to prevent loss and free up iPhone storage space. Transferring photos from iPhone to Mac is easy, and the post will show you two easy ways to finish the task within seconds.
Part 1. Import Photos from iPhone to Mac via iPhoto
If your Mac computers have the iPhoto application installed, you are able to use the app to import photos from iPhone to Mac. This way is easy but useful. The following guidance will show you how to transfer photos from iPhone to Mac via iPhoto.
Step 1: Connect your iPhone to the Mac with USB cable.
Step 2: Run iPhoto app on Mac. Then it will recognize your iPhone automatically and display it under the DEVICES category.
Step 3: You will see the pictures contained in the iPhone in the right panel of the application. And you can select all photos or mark those that would like to copy.
Step 4: Press “Edit” button and select “Copy” option to copy all the pictures that you imported from iPhone.
Step 5: Press “Edit” and choose “Paste” to paste the imported images and save them to your Mac hard disk.

Part 2. Transfer Photos from iPhone to Mac with Leawo iTransfer for Mac
Apart from using iPhoto, you are also able to take advantage of the third-party iPhone transfer software to finish the task. Amomg all kinds of iPhone transfer tools, Leawo iTransfer for Mac is highly recommended. The software is used for transferring files among iOS devices, iTunes and Mac computers, and it enables users to transfer various kinds of files without using iTunes. The following guidance will show you how to transfer photos from iPhone to Mac with Leawo iTransfer, and you can free download the software to have a try.
![]()
![]()
Step 1. Run Leawo iTransfer for Mac and connect iPhone to Mac computer with the USB cable. The software will recognize your iPhone.
Step 2. Click the name of iPhone and choose Camera in the left sidebar. The iPhone photos will display in the right part of the software window.

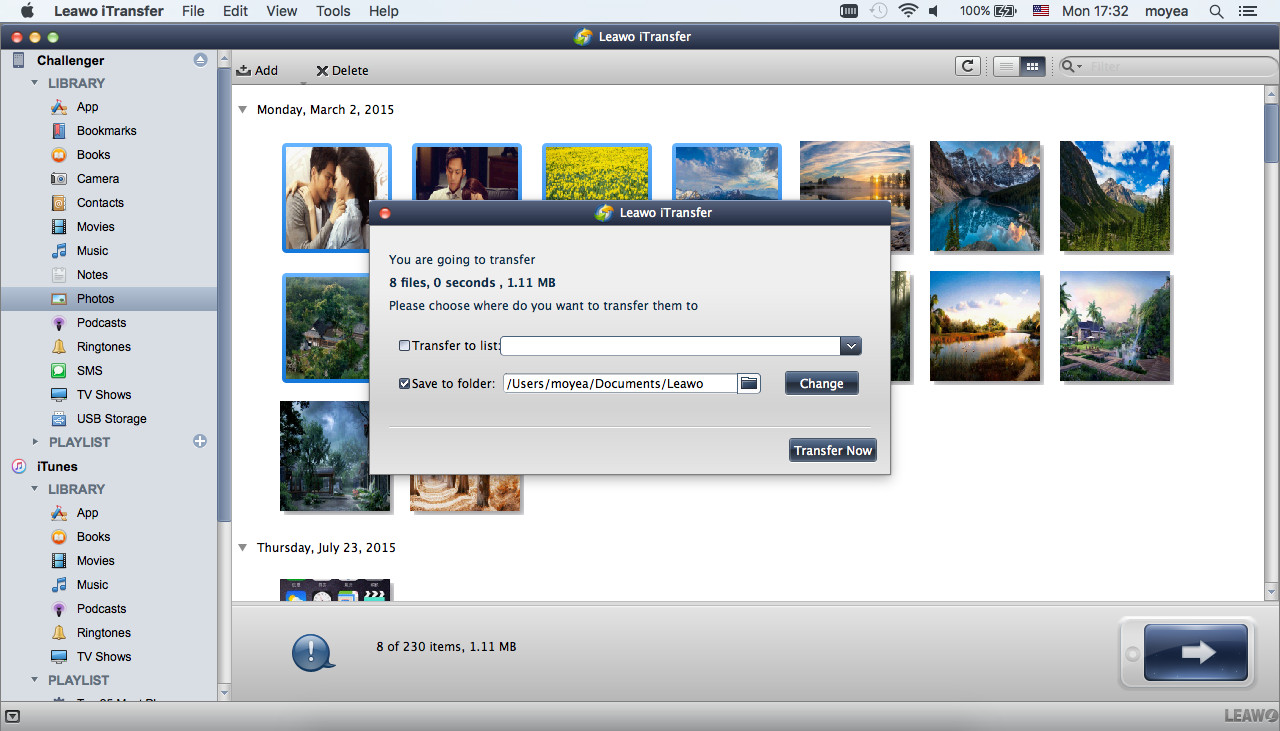
Step 3. Hold Command/Shift key to select the photos you want to transfer, and click the transfer button at the right bottom. Or right-click one selected photo and choose Transfer to > My Computer.

Step 4. After selecting photos, you’ll see a pop-up dialog. Check Save to Folder and click Change to choose a folder on your computer to save the photos. Then click Transfer Now to start to copy photos from iPhone to Mac computers.
When the transfer finishes, you will get the photos in target folder. If you want to transfer photos which are synced from computer, you can choose Photos library in the left sidebar of Leawo iTransfer, and select photos to transfer.
-

MovPilot Review: Reliable Video Downloader or Not?
-
Easy Guide: How to Watch Amazon Prime on Chromecast?
-
YT Saver Video Downloader Review: All That You Should Know
-
QuickTime Player Review: Is It Still the Best for Mac?
-
WinX DVD Copy Pro Review: All Details Explianed
-
7 Best TikTok MP3 Converters for High-Quality Audio
-
MakeMKV Review (2026): Pros, Cons, Features
-
The Ultimate Guide to Extract Audio from DVD
-
Best Ways to Screenshot Facebook Stories on Any Device
-
How to Convert TikTok Audio to MP3 in Seconds?


-
Best Twitter Porn Accounts You Shouldn’t Miss
-
How to Download Pornhub Videos? Ways to Download from Pornhub
-
Full Review of Savethevideo: Is Savethevideo Safe & How to Use it?
-
Top 5 OnlyFans Viewer Tools to View OnlyFans Content for Free
-
Netflix Download Limit: What it is & How to Avoid
-
How to Import Bookmarks from Safari to Chrome
-
Full Guide to YouTube Members Only Videos: Watch, Download
-
How to Download MissAV Porn Videos in HD for Offline Viewing?
-
4 Methods to Burn ISO Files to Blu-ray Discs Easily
-
How to Download Videos from Fansly with Fansly Downloader