How to Use Leawo Free Screen Recorder
Leawo Free Screen Recorder is a 4-in-1 recorder combo, including free screen recorder, free webcam recorder, free audio recorder and free screenshot snapper. This free recorder combo could help you record screen activity, record webcam video, record audio only from computer system or microphone, and snap screenshot with practical editing tools. Download and install Leawo Free Screen Recorder, and then follow the below guide to learn how to use Leawo Free Screen Recorder to record computer screen, webcam, audio and snap screenshot.

How to use free Screen Recorder module to record screen?
The free Screen Recorder module could help you record computer screen activity with audio for totally free. It could help you record full screen or selected screen area to videos in MP4 format at high quality.
Step 1: Set recording preferences

Click the “Menu” button at the top-right corner of Leawo Free Screen Recorder and then choose “Settings” option on the drop-down menu. You will enter the “Settings” panel, where you could complete settings upon Recording, Output, Mouse, Hotkeys, and Others. These settings make sure you get what you want. Click the “OK” button to save changes and quit the Settings panel.
Step 2: Set recording area
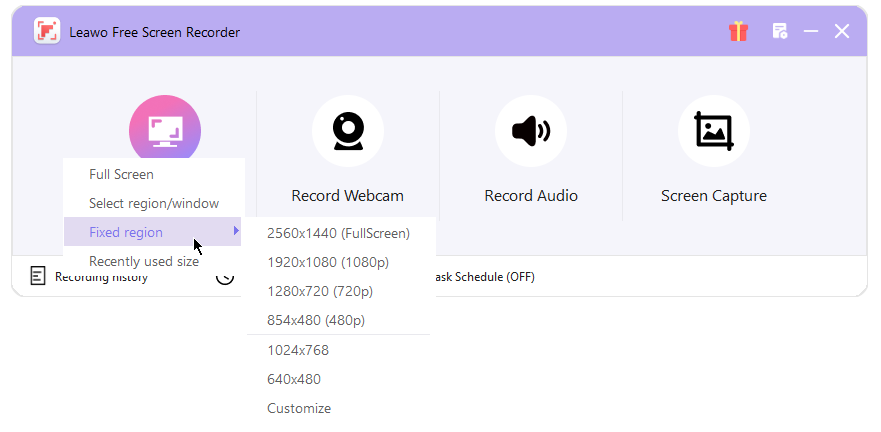
Click the “Record Screen” button and then choose the recording area in the drop-down menu. You could choose to record Full Screen, Select region/window, Fixed region (which provides multiple fixed resolution and enables you to customize recording area), or adopt Recently used size for recording.
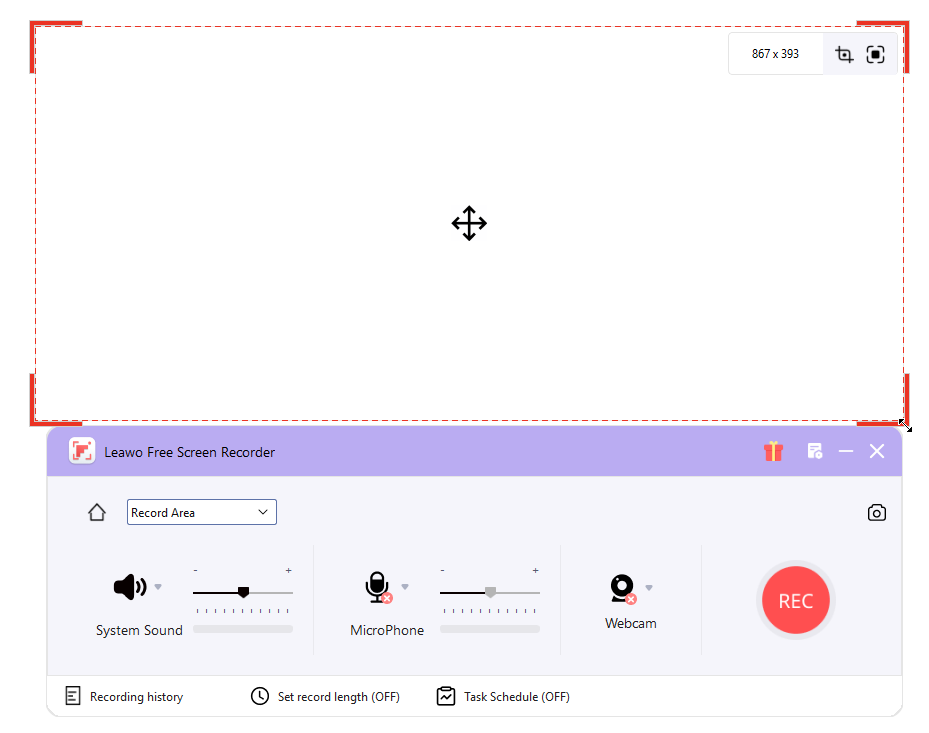
After you have set the recording area and size, you could adjust the recording area position and resize the recording area directly and manually by dragging the corner of recording frame.
Step 3: Configure audio related recording settings
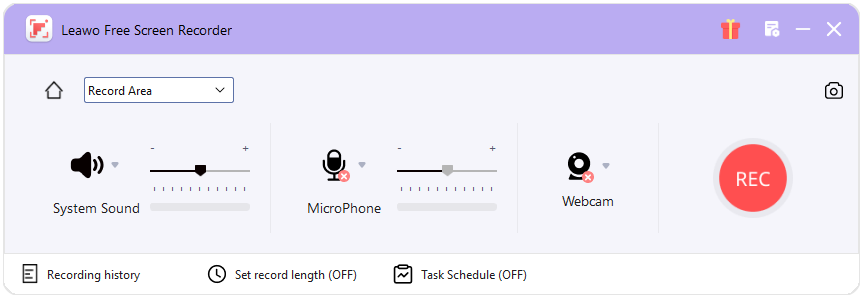
By default, Leawo Free Screen Recorder will record computer audio, but allows you to choose to record audio from microphone or webcam upon your needs. You are able to adjust the audio volume, click the inverted triangle icon next to the System Sound audio icon to choose audio source, record computer screen without audio by directly clicking the System Sound audio icon until you see a red crossing icon appear on the audio icon.
Besides, you could set the recording length or even schedule recording by making use of the Task Schedule feature. To set recording length, just click the “Set record length” option and then complete settings on the drop-down menu.
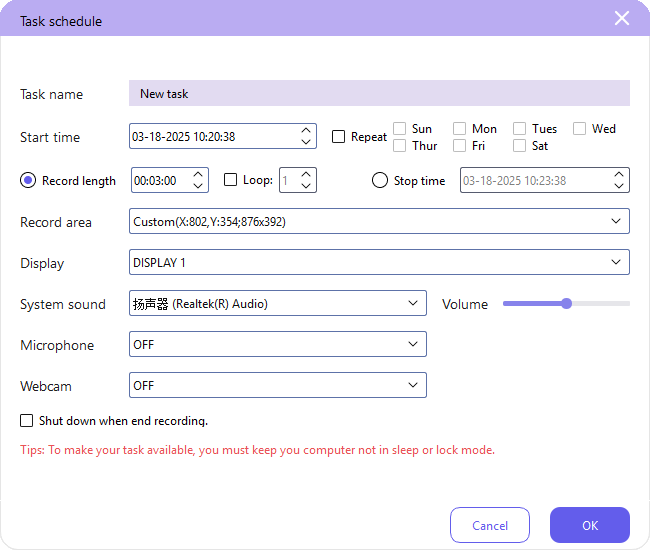
To schedule recording, click the “Task Schedule” option. There will pop up a “Task schedule” window, where you need to click the “+ New Task” button and then name the new recording.
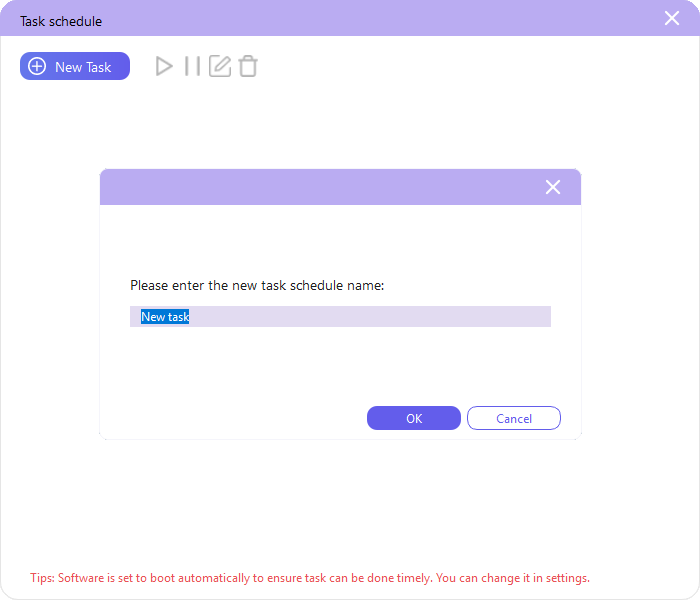
By clicking the “OK” button, you will be guided to the “Task schedule” settings panel, where you need to set the Task name, Start/Stop time, Record length, Record area, audio source (System sound, Microphone audio, or Webcam audio), etc. After setting these, click the “OK” button to save and schedule recording.
Step 4: Start recording
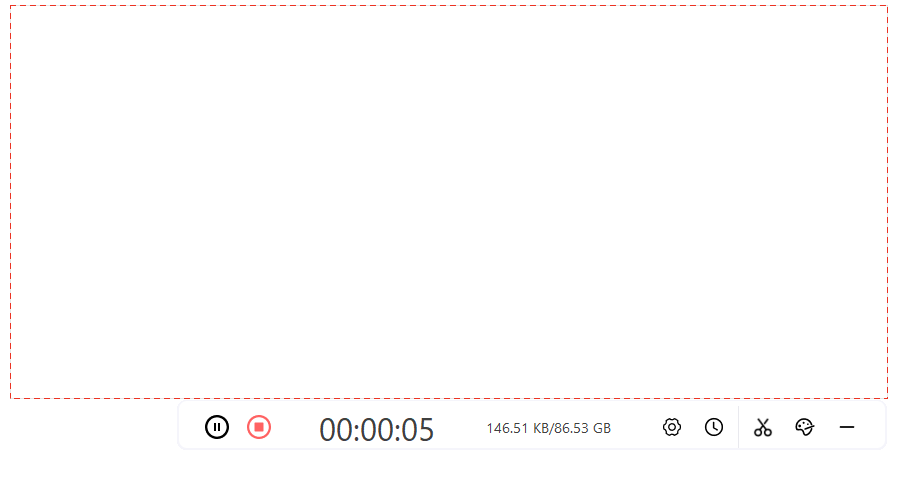
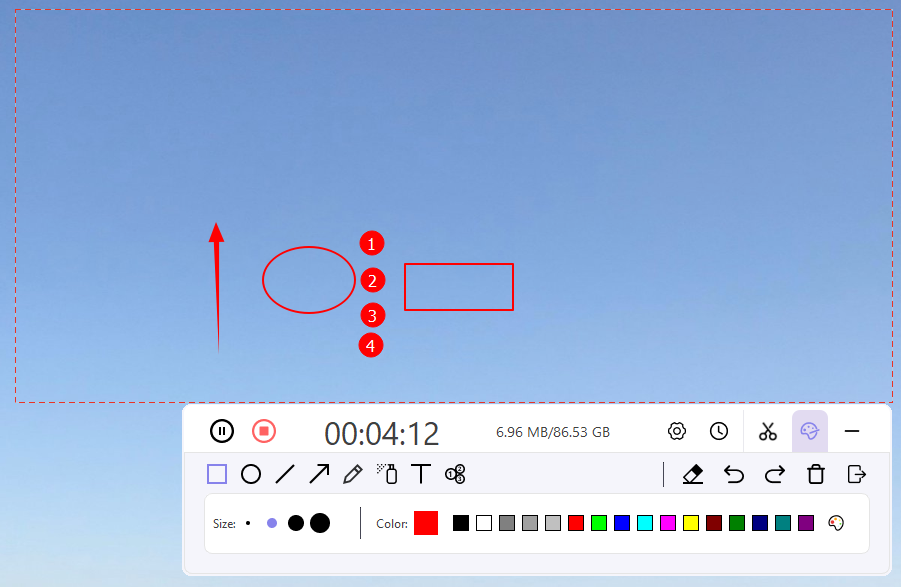
Then, click the red REC button to let Leawo Free Screen Recorder start recording screen after the countdown. You could view the recording length and size. During the recording, you could pause or stop recording anytime you like, click the wheel icon to reset audio source, set recording length, hit the scissor icon to snap screen, or click the “Paint” icon for drawing during recording. There are multiple tools for you to draw the recording in the Painter toolbar.
Step 5: View recording
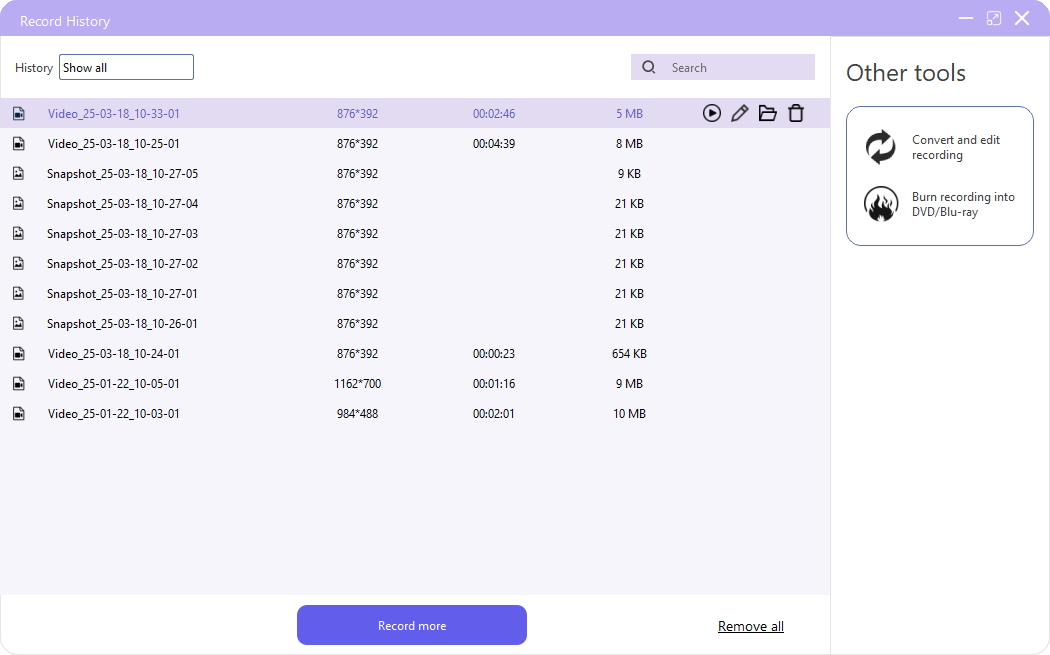
Once you stop recording, you will be guided to the “Record History” window to view all recordings. You could play back recording, rename recording, open recording file folder or delete recording. On the right sidebar, Leawo Free Screen Recorder provides you with additional solutions for recordings: convert and edit recordings, and burn recording to DVD/Blu-ray.


