

Leawo PowerPoint to DVD Pro User Guide
Leawo PowerPoint to DVD Pro offers professional but easy-to-operation solution for Office users to watch their PowerPoint slideshow on TV with DVD player. It burns PowerPoint to Standard DVD with customized beautiful DVD menus for easy navigation with a remote control. Besides PowerPoint to DVD, it is also a PowerPoint to Blu-ray Burner to burn PPT to Blu-ray Disc and PowerPoint to video converter to convert PPT to over 20 video formats.

How to convert PPT to video and burn to Blu-ray/DVD discs
Step 1 : Import PowerPoint files
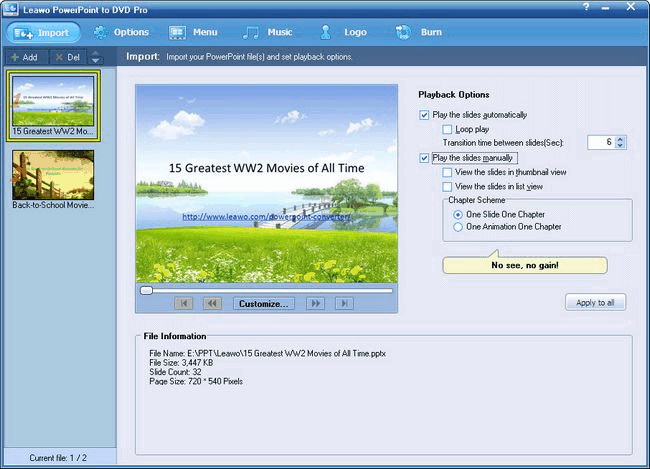
Drag your PowerPoint files into the program, or click “Import” or “Add” button and browse in your PowerPoint documents. Select one PowerPoint file to preview it. On the right, you will see playback options:
- Play the slides automatically: Enable your PPT file on automatic advance mode.
- Transition time between slides: Defaulted to 6 seconds, ranging from 0-100 second(s).
- Play the slides manually: Advance slides with remote control.
- Chapter Scheme: One Slide One Chapter and One Animation One Chapter.
Step 2 : Choose output mode
Click “Options” tab to choose an output mode: Create Standard DVD, Convert to Video File or Create Blu-ray Disc.
Step 3 : Convert PowerPoint to video/DVD/Blu-ray Disc
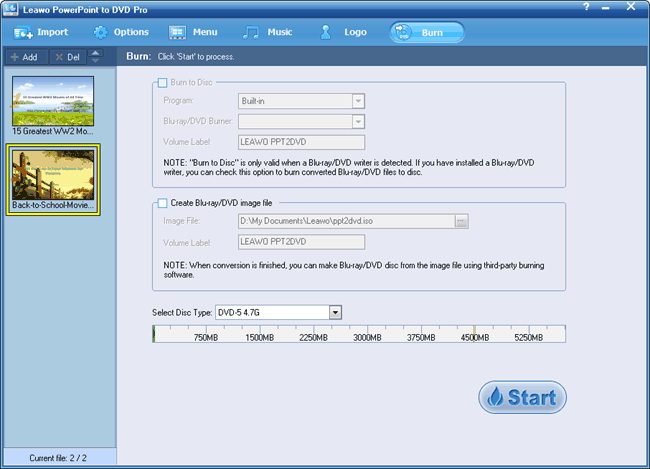
To burn the PowerPoint files to disc, you should first have a DVD/Blu-ray writer installed and a blank DVD or Blu-ray disc mounted on your PC. Then you can choose to directly burn PowerPoint to DVD or Blu-ray Disc or Create DVD/Blu-ray image file for burning to disc in the future. Now click “Start” to convert your presentations to video/DVD/Blu-ray.