Leawo Music Recorder User Guide
As the best music recording software, Leawo Music Recorder includes multifunctional music recording capabilities. It could act as streaming audio recorder to record streaming audio, and record online audio as well. Meanwhile, it could record built-in input audio stream or Mic audio stream. It saves recorded audio files in MP3 and WAV formats for widely using. With abundant bonus features like recording Task Scheduler, auto filter and split, file manager, Leawo Music Recorder makes music recording easier and friendlier. This tutorial of music recorder would show how to record audio with Leawo Music Recorder.
-
Record Music
Advanced Settings
How to record music with Leawo Music Recorder
Step 1Set audio source
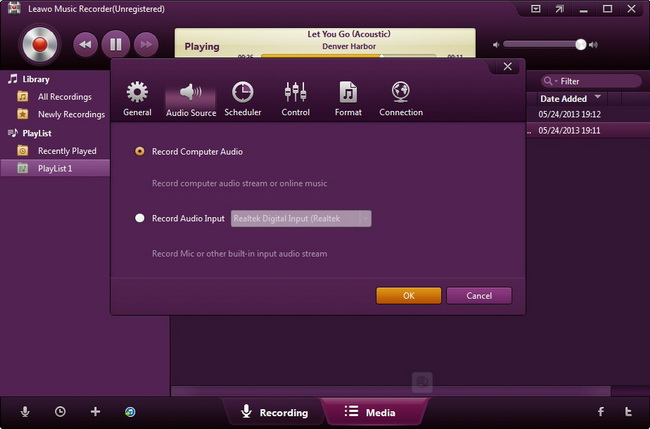
After launching Leawo Music Recorder, click the bottom-left “Audio Source” icon to set audio source you want to record. Two options are provided for you to choose from: Record Computer Audio and Record Audio Input. Detailed explanation has been provided respectively. Check the one according to your situation.
Step 2Start recording music
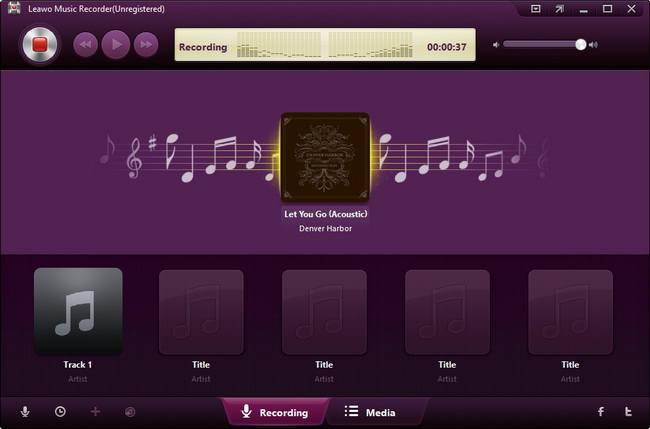
Click the red “Start” button to make Leawo Music Recorder start to record. Leawo Music Recorder could automatically capture audio and start recording. It should be noticed that you need to run Leawo Music Recorder before the audio source.
Tips:
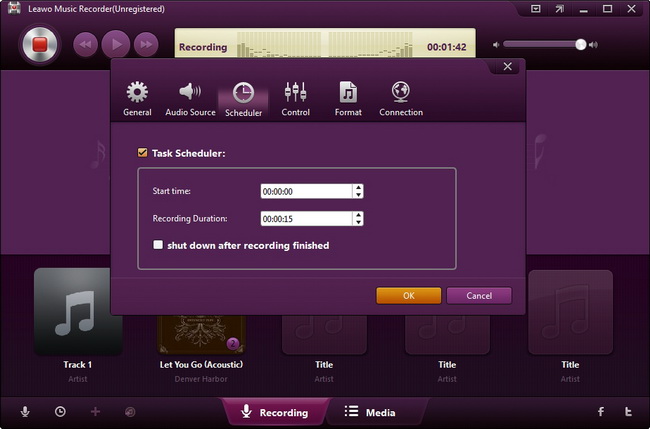
Leawo Music Recorder provides Recording Task Scheduler for you to schedule recording by presetting the recording start time and duration. You can click the “Recording task scheduler” on the bottom-left corner of Leawo Music Recorder to set the recording start time and duration.
Step 3Manage recordings
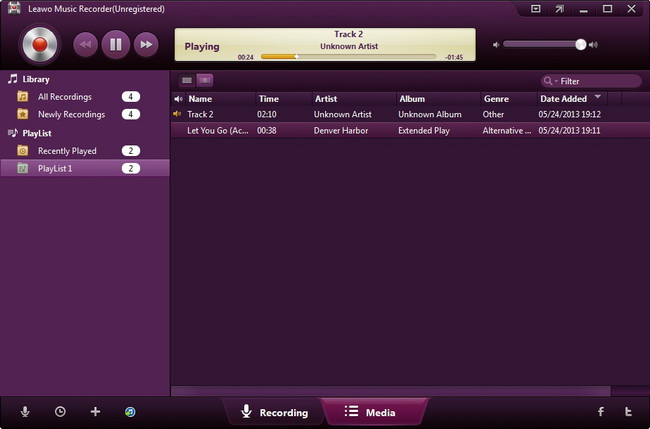
When the recording finishes, the recorded music files could be managed in “Media” interface, where you can see the recording Library and Playlist.
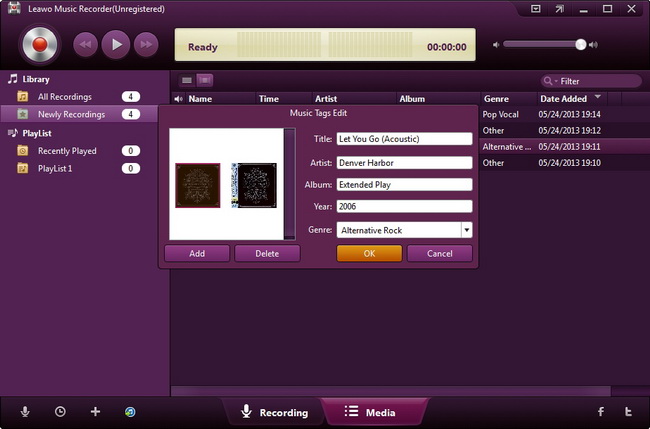
In Library tab, you can see All Recordings and Newly Recordings. All recorded files are displayed with tags like Time, Name, Artist, Album, Genre, Date Added. You can make further editing work on recordings by right-clicking the desired recording and select “Edit Music Tags” to edit Title, Artist, Album, Year, Genre and Album Cover.
In Playlist tab, you can add, edit and delete playlist for your recordings. You can directly drag and drop recordings from Library to corresponding playlist and play it back.
Related program settings
Click the inverted triangle icon on the upper-right and then click “Settings” option to do program settings.
In General, you can set the Output directory to save recordings and set whether to Enable automatic update check of this program or not.
In Audio Source setting panel, you can select the audio source for recording: Record Computer Audio or Record Audio Input.
In Scheduler panel, you can set whether to use the Task Scheduler or not, and set the Start time and Recording Duration.
Under Control panel, you can set the time gap to decide split or not, filter time duration and decide whether to get music info while recording or not.
Under Format tab, you can set the Output Format of recordings and do Audio parameter settings like Audio codec, Bit Rate and Sample Rate.
Under Connection tab, you can do Proxy settings.
Users Say
As consumers, I love companies offering solid product guarantees. It proves the company has faith in its product, and is making a solid effort to gain your trust.
-From Donald through our support center
Social Network
Join Our Newsletter: