Leawo Prof. Media User Guide
Leawo Prof. Media is a 16-in-1 multimedia converter suite to offer multimedia conversion solutions upon 4K Blu-ray, Blu-ray, DVD, video (up to 4K), audio and photo files. It could decrypt, rip, convert and copy 4K Blu-ray/Blu-ray/DVD, convert video and audio, turn photo to slideshow video, burn video/photo to DVD/Blu-ray/4K Blu-ray, remove Cinavia from Blu-ray/DVD, convert 2D to 3D, etc. Check the below guide to learn how to use Leawo Prof. Media to handle media file format issues between DVD, video, audio, photos, online videos, Blu-ray and 4K Blu-ray.


Convert video/DVD/Blu-ray/4K Blu-ray
As professional total media converter combo that features UHD Ripper, Blu-ray Ripper, Blu-ray Recorder Ripper, DVD Ripper and Video Converter, Leawo Prof. Media could easily convert video, audio, DVD, Blu-ray and even 4K Blu-ray to video/audio files in 180+ formats.
Step 1 : Add source media files
Under Convert tab, click "Add Video" or "Add UHD/Blu-ray/DVD" buttons to add source media files respectively into the program for converting. After loading, you could choose subtitles and audio tracks from source media files, play back imported media files, move down or up to adjust the converting order, rename the files, check details of imported media files, etc.

Tips:
1) Leawo Prof. Media allows you to merge several videos into one file. You can check multiple videos files and then right click to choose "Merge" or then click the blue "Merge" button to merge several files into one.
2) You can freely choose subtitles and audio tracks from source media files on the bottom of the left processing list panel. What’s more, if you’re going to convert video files, you can import external subtitles.
3) While adding DVD movies, there're 3 different loading modes: Full Movie, Main Movie and Custom Mode. Full Movie mode loads entire source DVD movies, Main Movie loads the longest title of source media file (generally the main movie), while Custom Mode allows you to select titles for loading.
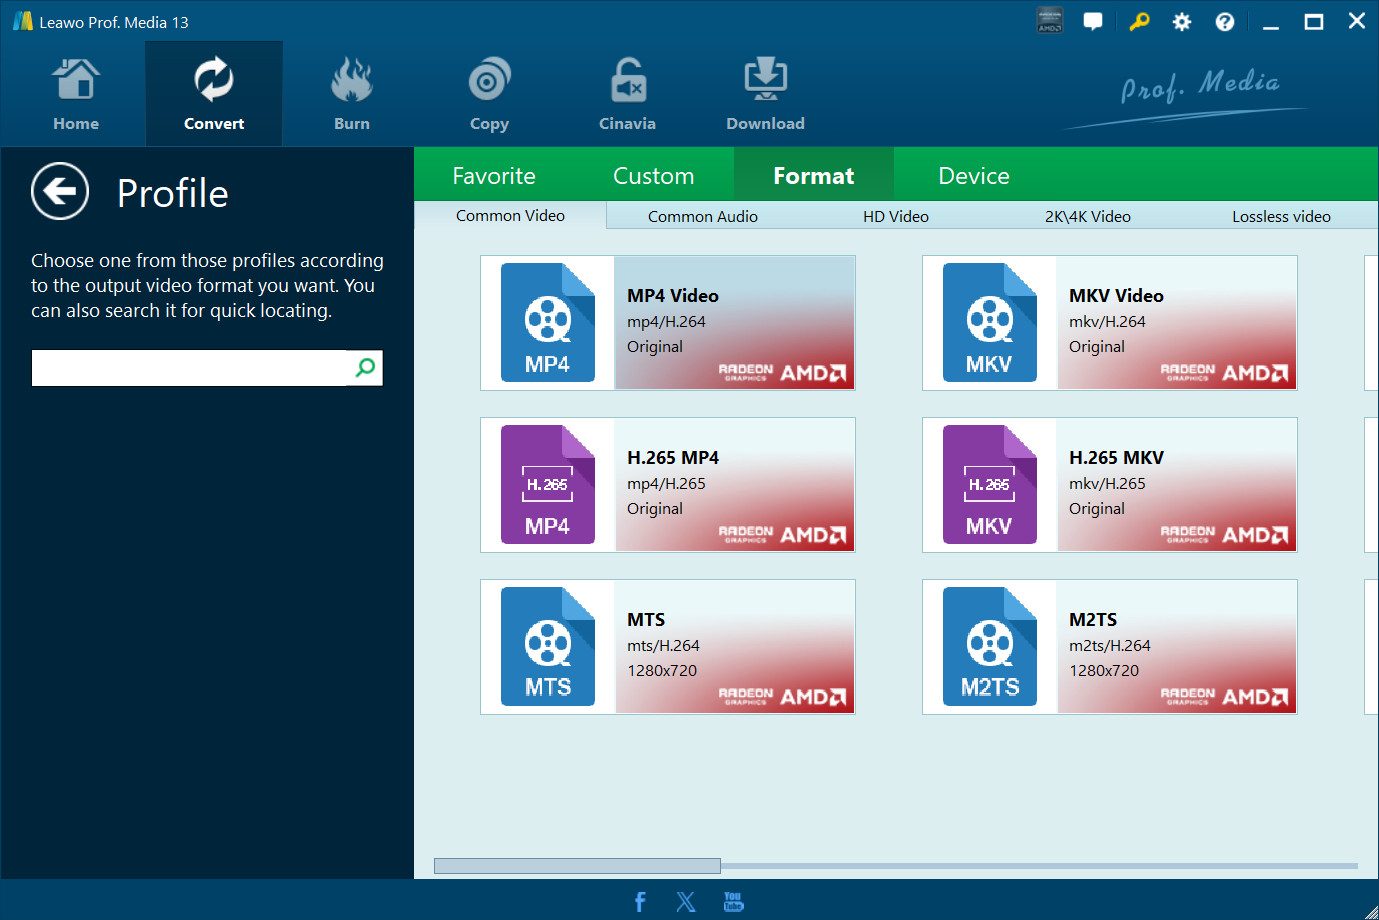
Step 2 : Choose output format
Next to the "Add Photo" button, you will see a clickable "Output Format" box (displayed in MP4 Video by default, as showed in Step 1 : ), by clicking which you could set output format for conversions. On the drop-down box, select "Change" option to select desired profile as output format from "Format" and "Device" categories.
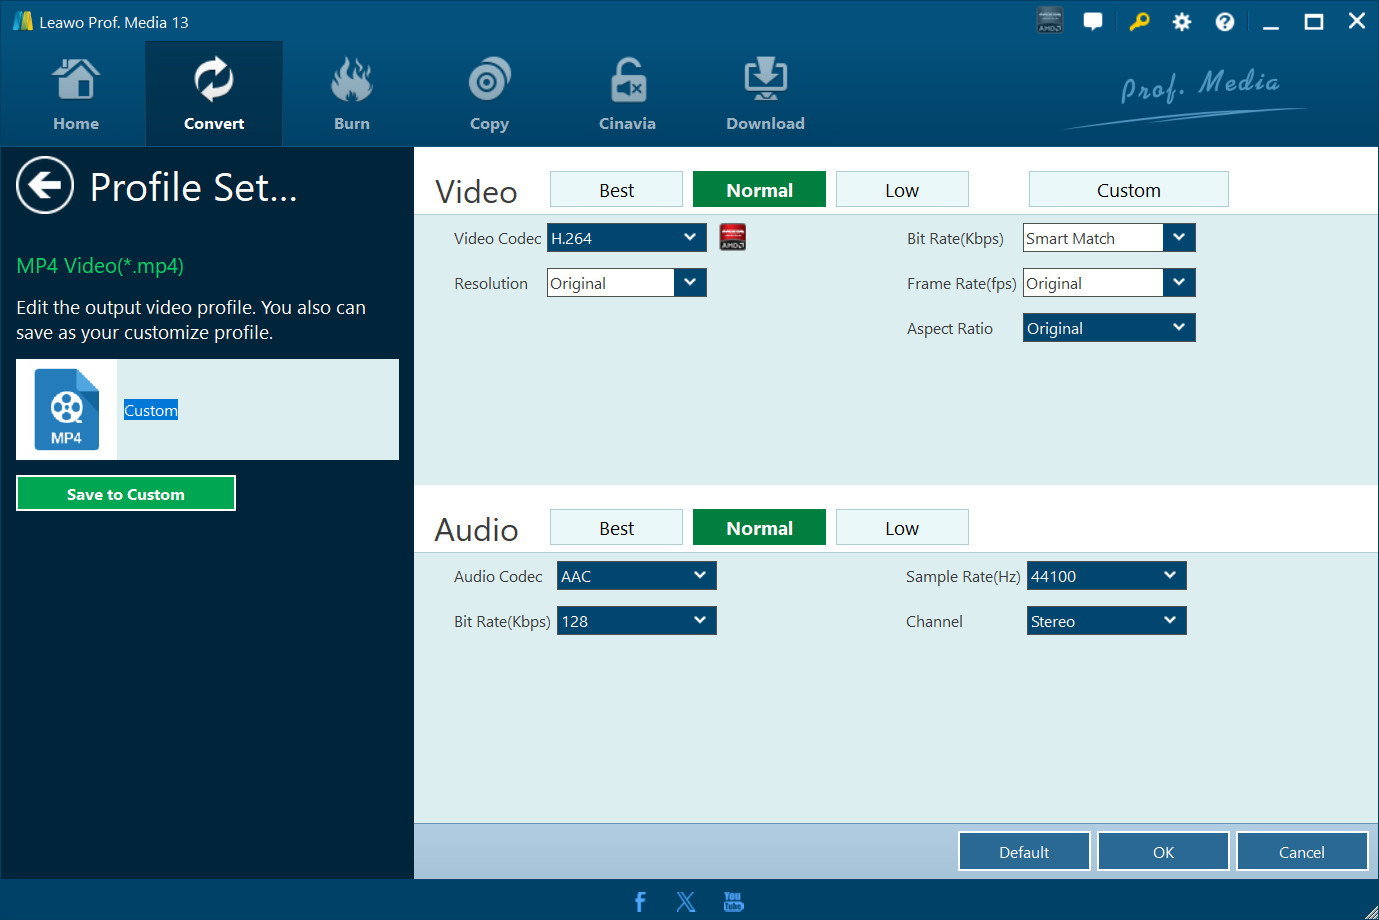
Optionally, you can add formats to "Favorite" group or edit profiles to add into "Custom" group. Leawo Prof. Media allows you to adjust output format parameters such as audio and video codec, quality, bit rate, video frame rate, video resolution, audio sample rate, etc. On the Profile panel, move mouse to desired profile and then you will see an "Edit" icon on the upper-right corner of the selected profile icon. Click it to enter the Profile Settings panel. Or, after you set profile and go back to the main interface, click the "Output Format" drop-down box and then select "Edit" button to enter the Profile Setting panel.
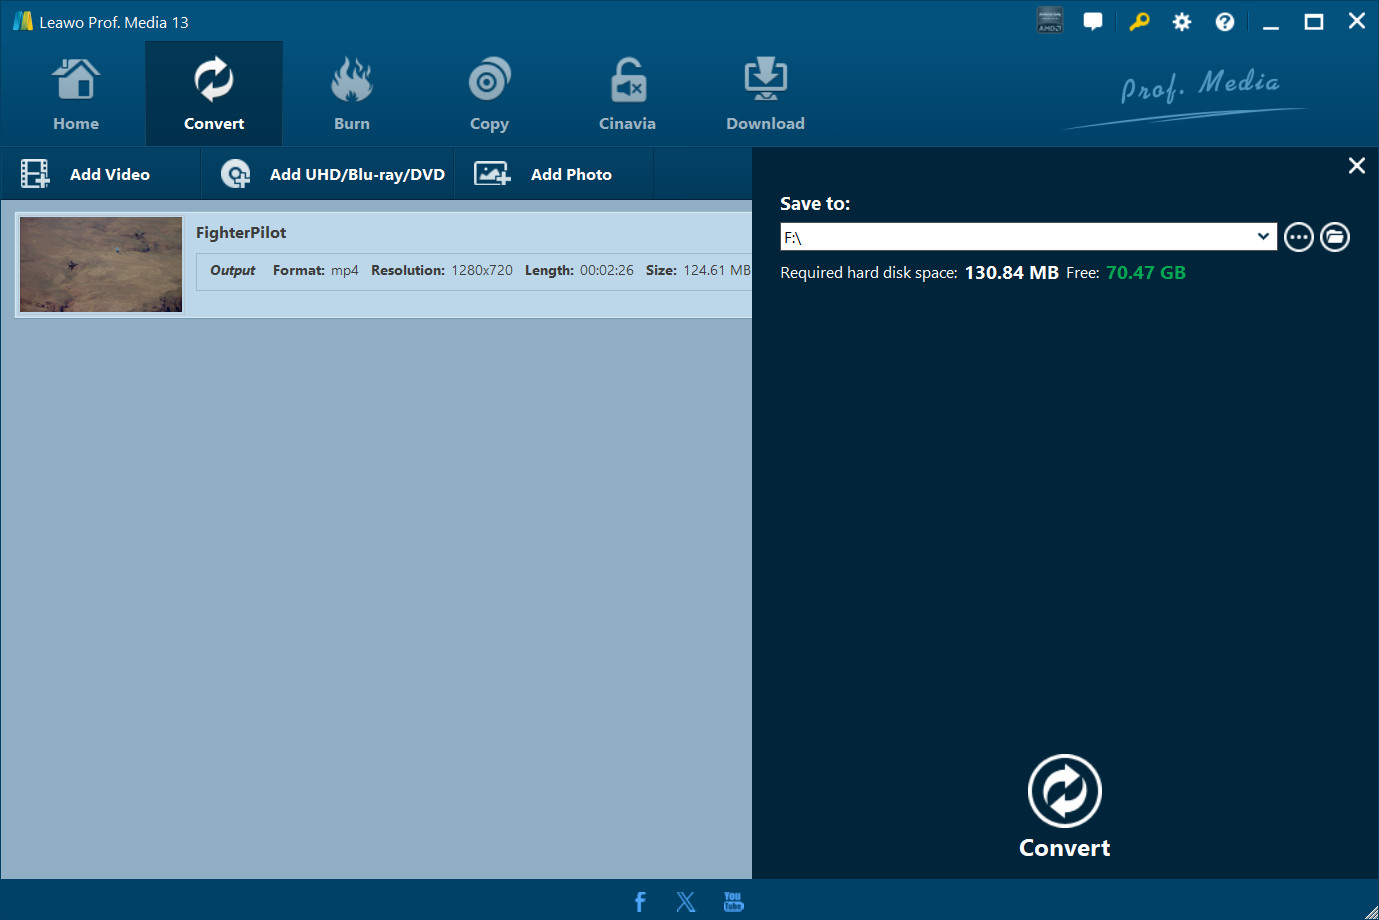
Step 3 : Set output directory
After setting the output format, go back and then click the big green "Convert" button on the sub-menu bar to call out the output directory setting panel. Set an output directory in "Save to" box.
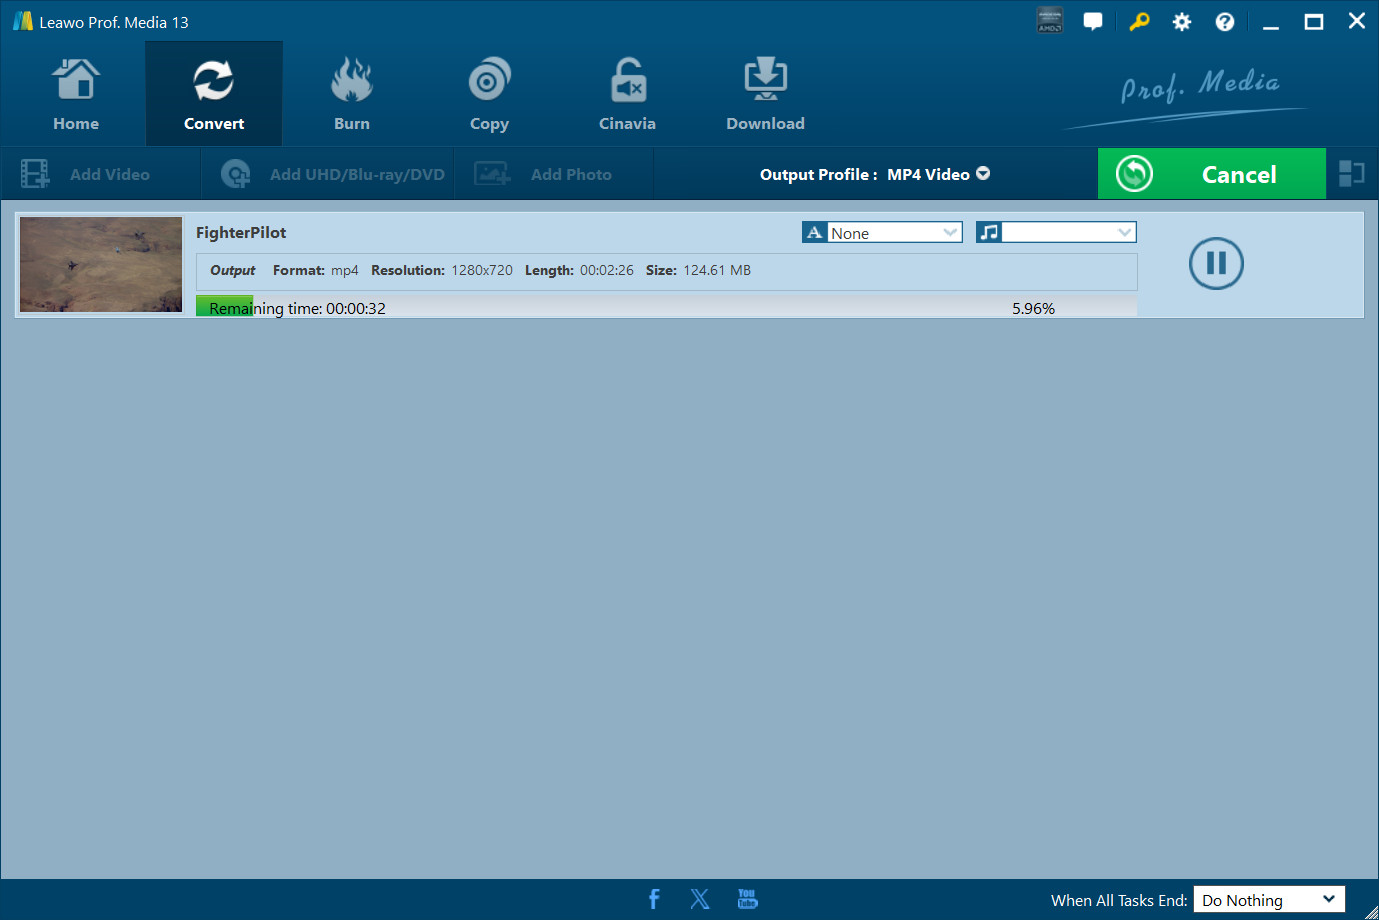
Step 4 : Start the converting
Then, click the "Convert" button at the bottom to start converting.