Leawo Blu-ray Recorder Ripper User Guide
Step 1: Enter Leawo Blu-ray Recorder Ripper module
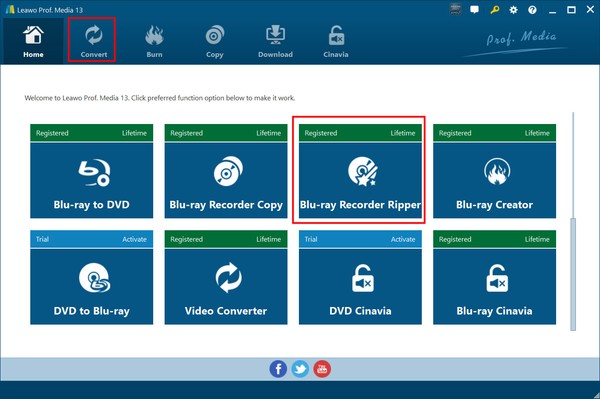
Download, install and launch Leawo Prof. Media. Click the “Blu-ray Recorder Ripper” option or open the “Convert” tab to enter the Blu-ray Recorder Ripper module.
Step 2: Add recorded Blu-ray source
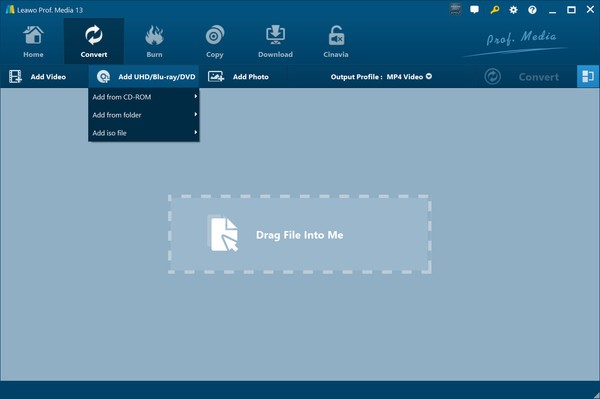
On the “Convert” tab, click the “Add UHD/Blu-ray/DVD” button to call out the drop-down menu, which allows you to choose to add homemade Blu-ray disc, folder or ISO image file according to your needs. You could also directly drag and drop source BDAV Blu-ray content to Leawo Blu-ray Recorder Ripper for converting.
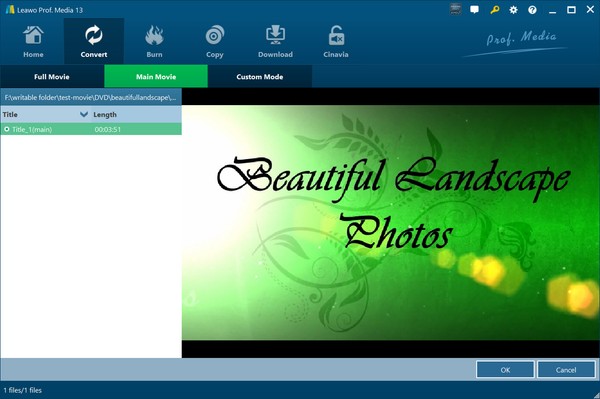
After you browse and load BDAV Blu-ray from disc or computer, you need to choose either Full Movie, Main Movie or Custom Mode to load source Blu-ray content.
l Full Movie: Load entire source BDAV Blu-ray content for converting.
l Main Movie: Load the main movie (by default the longest title) from source BDAV Blu-ray content for converting. You are allowed to select any other title as main movie for converting.
l Custom Mode: Load the title(s) you prefer for converting.
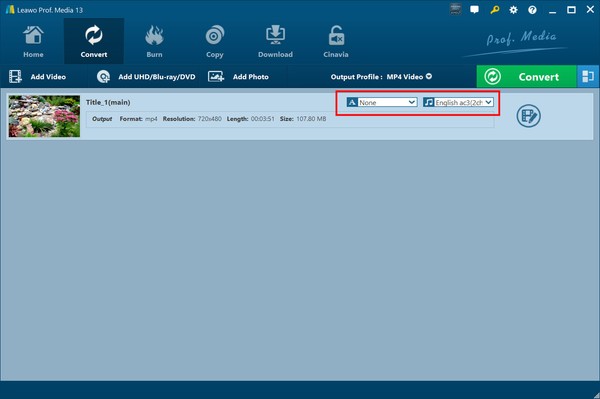
After loading source BDAV Blu-ray content, you could then select subtitle and audio track for output, play back loaded BDAV Blu-ray content, merge multiple titles into one, adjust the title order, etc.
Step 3: Edit BDAV Blu-ray (optional)
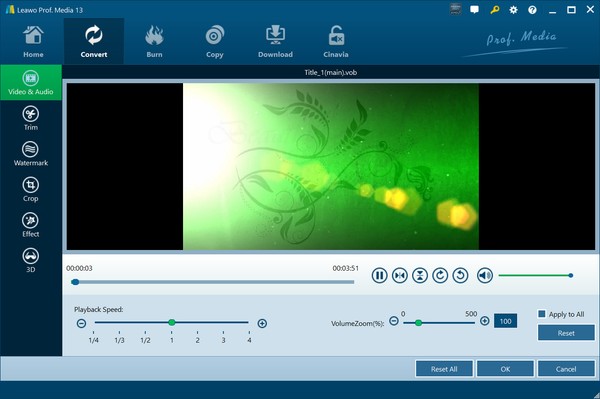
Click the “Edit” icon in a loaded title to enter the video editing panel to edit loaded BDAV Blu-ray content, where you could adjust video playback speed, rotate video, adjust audio volumezoom, trim video length, crop video size, add image or text watermark, adjust video effect including brightness, saturation and contrast, apply 3D effect and adjust 3D depth, etc.
Step 4: Set output format
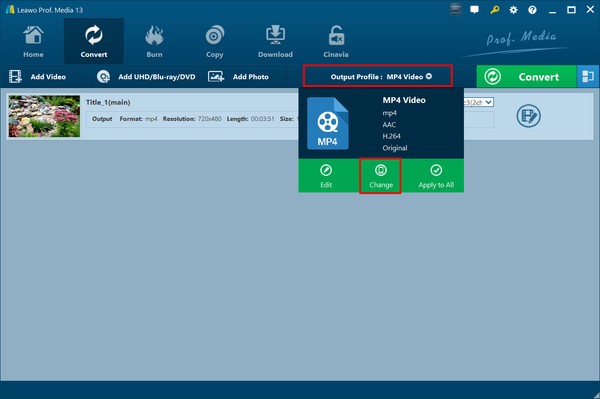
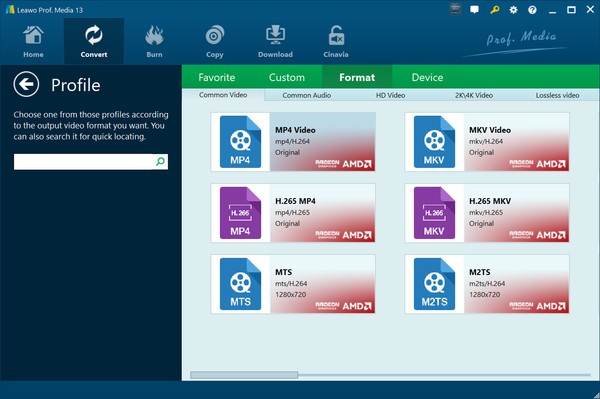
Click the “Output Profile” button on the submenu bar and then click the “Change” option to enter the Profile panel, where you could select output format.
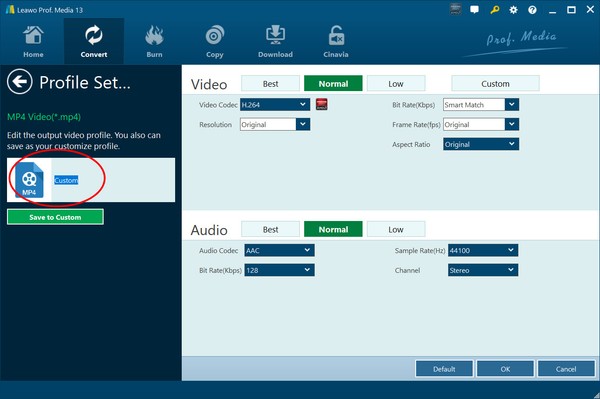
You could select output format from either “Format” or “Device” group according to your needs. What’s more, you could adjust video and audio parameters of selected output profile by clicking the pencil icon on each profile option, or clicking the “Edit” option on the “Output Profile” drop-down menu. You could adjust video bit rate, aspect ratio, frame rate, codec, resolution, audio codec, sample rate, audio bit rate, audio channel, etc.
After adjusting these parameters, you could save the changes into Custom group for future use.
Step 5: Set output directory
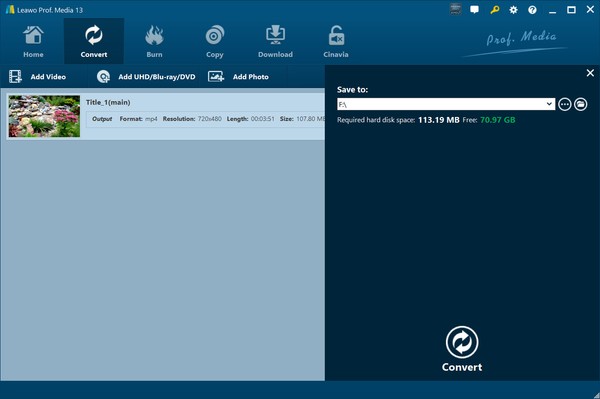
After setting output format, click the green “Convert” button on the submenu bar to call out the sidebar on the right, where you need to set the output directory in the “Save to” box.
Step 6: Start converting BDAV Blu-ray
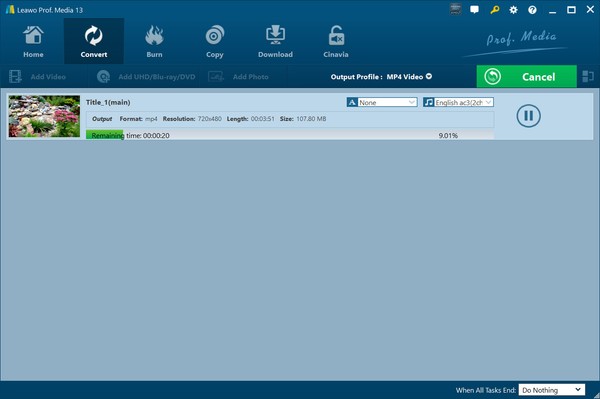
Finally, click the “Convert” button at the bottom to start converting BDAV Blu-ray content to digital video/audio files. You could view all on-going conversion tasks, and cancel/stop BDAV Blu-ray conversions anytime you want. Once the conversion completes, you have successfully converted BDAV Blu-ray to digital video/audio files.


