Leawo Video Converter Pro for Mac User Guide
As an all-in-one and versatile multimedia program that comprises Mac DVD Ripper, all-inclusive Video Converter for Mac, photo slideshow maker, screen recorder and camera video recorder, Leawo Video Converter Pro for Mac could easily convert between standard and HD videos, and rip and convert DVD to video in both standard and HD video file formats, create photo slideshows, record screen activities and camera videos. Also, Leawo Video Converter Pro for Mac helps convert 2D DVD/video to 3D video and edit your DVD/video content to make customizations as well. Free download this comprehensive Mac Video Converter Pro and then follow the below guide to know how to use Leawo Video Converter Pro for Mac.
Convert
DVD/videosSlideshow
MakerScreen
RecorderCamera
RecorderVideo
Editing2D to
3D
Convert DVD/video
Leawo Video Converter Pro for Mac performs excellent in converting video between different video file formats, and ripping and converting DVD to video in both standard and HD video file formats for you to freely enjoy DVD or video on various media players on the go. Only three simple steps would help you rip DVD to video and convert video between all popular video file formats.
Step 1Import DVD/Video
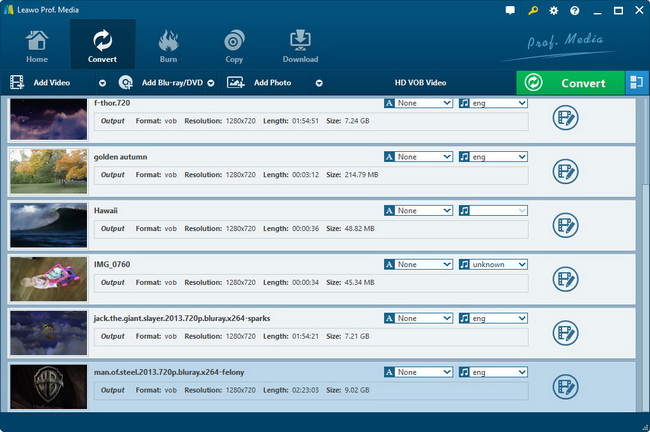
Drag-and-drop DVD/video files or simply click “Add Video” icon to import video files/click “Load DVD” icon to import DVD files to this total video converter for Mac for converting. You can select subtitle and audio tracks, play source media files, snap screenshots, etc.
Step 2Set target profile:
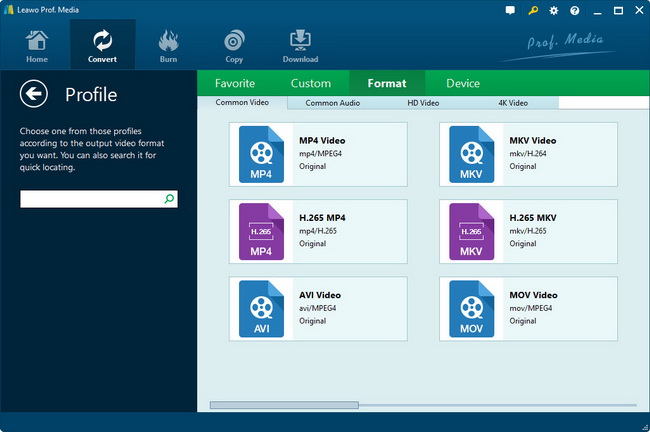
Click the clickable icon before 3D to set target profile as output profile. Various output profile options are provided for you to choose from, according to your devices. For your convenience, you can directly input your desired format or your device name to the profile search bar for quick profile settings.
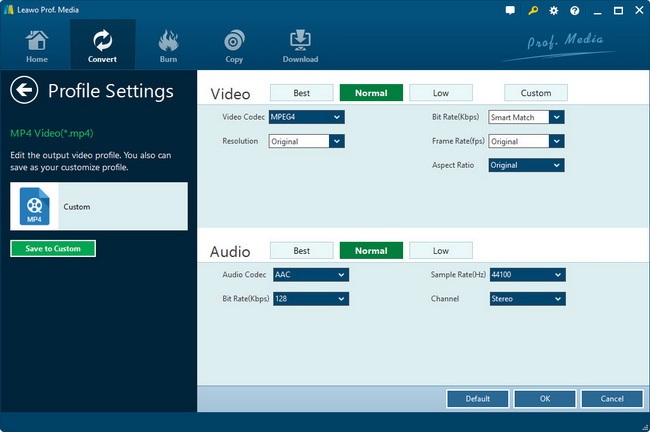
To meet your devices or your needs exactly, you can click "+" button to reset profile parameters, including: video codec, audio codec, quality, video size, bit rate, frame rate, aspect ratio, etc.
Step 3Set output directory
On the upper menu bar of your Mac computer, click “LeawoVideoConverterPro > Preferences > Convert > Output” to set output directory to save the output files.
Step 4Start to convert DVD/video
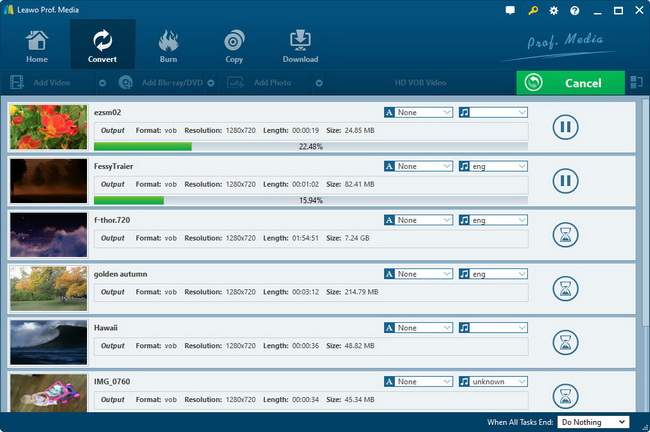
Back to the home interface and click the convert button on the bottom right to start to convert DVD to video or convert video between various video file formats. After the conversion, you can transfer DVD/video to your own devices for on-the-go enjoyment.
Create photo slideshows
Featuring a photo slideshow maker, Leawo Video Converter Pro for Mac also allows you easily create slideshows of your picture or photo collections. You could use the internal photo slideshow maker to create slideshows and then convert slideshow videos to other formats like MP4, AVI, FLV, etc. for playback on iPhone, iPad, iPod, Android devices, etc. or uploading to YouTube or Facebook for sharing.
Step 1Load source photos
After launching Leawo Video Converter Pro for Mac, on the main program interface, you could see a “Photo Slideshow Creator” icon, by clicking which you could browse source photos or pictures for loading. The Photo Slideshow Maker would automatically generate photo slideshows once source photos are loaded. You could then see the generated slideshows on the left processing list.
Step 2Edit slideshows
Double click the generated slideshow on the left processing list to get instant preview. On the preview panel, click the “Edit” icon to enter the Slideshow Editor panel, where you could do Video Settings, Audio Settings, insert music files through drag-and-drop, etc.
Step 3Pick up output format
Pick up a profile as output format for created photo slideshows so that you could use the slideshows at your own will. Click the clickable icon in each slideshow to enter the Profile setting panel to select output format and custom video/audio parameters of output profile.
Step 4Set output directory
Click “LeawoVideoConverterPro > Preferences > Convert > Output” on the upper menu bar of your Mac computer to set output directory to save the output files.
Step 5Save slideshows to computer
Click the button on the bottom right corner of the main program interface to save created photo slideshows to your computer. After that, you could transfer the slideshows to iPhone or iPad, or upload them to YouTube or Facebook for sharing.
How to Record On-Screen Actions with Screen Recorder?
The internal Screen Recorder allows you to record any screen activity on your Mac computer.
Step 1Launch Screen Recorder
Launch Leawo Video Converter Pro for Mac and then click the “Screen Recorder” icon on the program interface, showed below.
Step 2Do Screen Recorder settings
Then you’ll come to the “Screen Recorder” settings panel, on which you could set the Video Name, Save To (output directory to save the recorded screen-action videos), audio source, video quality, record region (you could customize it), etc. After settings, click the red button to start recording. The Screen Recorder would then be minimized to the Dock panel. If you want to stop recording, re-call it out and then click the red button again.
The default format of the recorded videos is MOV. If you want to get recorded videos in other formats, you could check “Add the video to converter after recording” option and then follow the below steps to convert recorded videos.
Step 3Select profile
Leawo Video Converter Pro for Mac would automatically load the recorded videos to the left processing list panel. You could double click it for playback. Click the icon before 3D button in the recorded videos to enter the Profile selecting panel to select output format.
You could click the “+” button on the profile panel to adjust video and audio parameters for output files, including: video codec, bit rate, video size, frame rate, aspect ratio, audio codec, channels, etc.
Step 4Set output directory
Click “LeawoVideoConverterPro > Preferences > Convert > Output” on the upper menu bar of your Mac computer to set output directory for recorded videos that have been converted to other formats.
Step 5Start converting recorded video
Click the bottom right button to start converting recorded videos from MOV format to other formats.
How to Use Camera Video Recorder to Record Videos?
With a Camera Video Recorder, Leawo Video Converter Pro for Mac enables you to easily record anything your Mac’s built-in camera or webcam captures, and then convert to various video formats for multiple players.
Step 1Launch Camera Video Recorder
After launching Leawo Video Converter Pro for Mac, click the “Webcam Recorder” icon on the program interface to enter the “Webcam Recorder”.
Step 2Do Webcam Recorder settings
Click the gear icon on the bottom right corner of the Webcam Recorder interface to call out the recording settings. You could set Video Name, Save To (directory to save recorded videos), Camera (which camera to record), audio source, video quality, resolution, etc. After setting, click “OK”.
Step 3Start recording
Click the red button in the middle button to start recording. When you want to stop recording, click it again. This Camera Video Recorder could also record audio.
The recorded videos by Webcam Recorder are in MOV format. Thus, if you want to get recorded videos in other formats, you need to check “Add the video to converter after recording”. After recording, Leawo Video Converter Pro for Mac would automatically load the recorded videos for converting. Follow the below steps to know how to convert recorded videos.
Step 4Set output
Click “LeawoVideoConverterPro > Preferences > Convert > Output” to set output directory to save recorded videos after conversion. Then, click the icon before 3D button to enter the Profile setting panel to set output format.
Click “+” button to customize video and audio parameters like video codec, audio codec, bit rate, aspect ratio, frame rate, channels, etc.
Step 5Start converting
Go back to the main program interface of Leawo Video Converter Pro for Mac. Click the button on the bottom right corner to start converting recorded videos.
Video Editing
Besides the ability to convert DVD/video to video and convert 2D to 3D, this Video Converter Pro for Mac also provides practical and useful video editing features for you to customize your DVD/video content before you start the conversion for more fun and enjoyment. Right click each DVD/video chapter and select "Media Edit" to enter the video editing panel. Five tabs could be seen: Trim, Crop, Rotation, Effect and Watermark.
Trim Video Length
Hit the Trim tab to trim video length to cut off unwanted video clips and shorten the video length by dragging the twin limiters on the player progress bar or set the Start Time and End Time.
Crop Video Size:
In the Crop tab, you can crop video size to remove video black margins so as to save space for your devices by setting the parameters of every directions or directly dragging the dot frame on the left Original Preview panel.
Rotatation:
You can rotate the video to a special angle for some specific devices and unique angle view.
Adjust Video Effects:
Click Effect tab to change video effects like Contrast, Brightness, Saturation, Volume, etc.
Add Watermark:
In Watermark tab, you can choose to add image or text watermark to your video content or not. Click Enable Watermark and you could freely choose whether to add image or text watermark. You can also customize your image or text watermark for better enjoyment.
2D to 3D conversion
Leawo Video Converter Pro for Mac could work as a 2D to 3D converter, which means that it could convert 2D DVD to 3D videos and convert 2D video to 3D videos for you to enable you freely create and watch 3D movies without limitation. Click 3D button and you can freely select 3D effect to add to your DVD/video files before you start to convert DVD/video. Choose the 3D effect that meets your devices or 3D glasses:
This Video Converter Pro for Mac also allows you to preview 3D effect you have set. You can preview 3D effect by clicking 3D Settings to enter the 3D preview panel, where you can also select 3D effect, set 3D Depth and preview 3D effect.
Users Say
As consumers, I love companies offering solid product guarantees. It proves the company has faith in its product, and is making a solid effort to gain your trust.
-From Donald through our support center
Social Network
Join Our Newsletter: