Last updated on 2017-12-18, by
How to Get Photos from iPhone to Mac
“I want to get photos from iPhone to Mac for a copy, how to do this?”
This tutorial is helpful for you to transfer photos from iPhone to Mac computers, and these methods are all easy to handle. Leawo iTransfer should be your first choice because it is easy to use and only takes you some time downloading the software. You can also get pho-tos off iPhone to Mac via Photos app, Image Capture or Email. Now you can follow the guidance to get it done.
Part 1. How to Get Photos from iPhone to Mac with Leawo iTransfer Mac
Leawo iTransfer is a polished tool for you to transfer files such as apps, music, movies, TV shows, ringtones, eBooks, photos and Camera Roll files among iDevices. Besides, it also supports transferring files from PC to your iDevices. You can finish all of the transferring job without having to sync your file with iTunes. But you need to have iTunes in your PC to make sure that your computer can read your iPhone.
Launch the software
Run this software on your Mac then connect your iPhone to your Mac with USB cable.

Locate photos
On the left sidebar, you can see that your iPhone is listed under it. Click on “Photos” in the left sidebar. Now, the iPhone photos will display in the right part of the software window.

Choose photos
Press Command/Shift key to select the photos that you want to transfer, then click on the transfer button at the bottom right. You can also right-click one selected photo and choose “Transfer to > My Computer”.

Transfer photos
In the pop-out windows, check Save to Folder and click Change to choose a folder on your computer to save the photos. Then click Transfer Now to get photos off iPhone to Mac.

Part 2. How to Transfer photos from iPhone to Mac via Photos App on Mac
Photos App is a powerful tool developed by Apple company. It is not just an album. When you edit and organize images in it, all your changes are kept up to date and visible on any iDevices.
Step 1: Run photos app on your Mac then connect your iPhone to your Mac with USB ca-ble.
Step 2: In the left side bar, click on Import then click on your device. Your iPhone’s pho-tos and videos will be displayed in the window beneath the tabs. Tick images in the win-dow to select the photos you’d like to import. Then click on the Import Selected button.

Step 3: Now “Last Import” album will open automatically for you to view the photos you just transferred.

Part 3. How to Get Photos off iPhone to Mac via Image Capture
There is an application program on Mac that enables users to upload pictures from digital cameras or scanners. The program is Image Capture. By connecting the device that stores your photo directly to the computer or the same network with Mac, you can transfer your photos from iPhone to Mac. What is more, this program can also collate pictures from a variety of sources with no need for drivers. The following guidance will show you how to transfer photos from iPhone to Mac computer by using Image Capture.
Step 1: Connect your iPhone to your Mac, launch the program and unlock your iPhone.
Step 2: In Image Capture, select the device in the Devices list on the left side. Now your pictures can be presented in the main interface of the program. Choose the pictures that you want to import to your Mac.

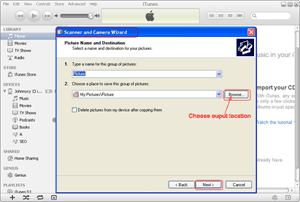
Step 3: At the bottom of the window, you can see there is a column for you to choose where to import your photos. Select a folder for your photo.

Step 4: To import the photos that you just selected, click on Import. You can also click Im-port All to transfer all of your photos to Mac. Select “Delete after Import” to remove the items from the device after transferring photos from iPhone to your Mac computer.

Part 4. How to Get Photos off iPhone to Mac via Email
You can get photos off iPhone to Mac by sending an email to yourself. This method only suites for those who haven’t many photos to transfer.
Step 1: Go to the Photos app in your iPhone, and select the photo you want to transfer, and click the “Share” button at the bottom left.

Step 2: Select Mails app. Write your own Email address in the “To:” column and complete other information before you send this new email. The disadvantage of this method is that the size of your photos would be limited.

Of all these methods, we can see that even though you need to download Leawo iTransfer, the transfer process won’t consume you too much time. To get photos from iPhone to Mac via Photos App or Image Capture are comparably easier compared with transferring photos from iPhone to Windows 10 via email, because there is no limitation on how many photos can be sent each time.
-

[Review] Best Disney Plus Downloader to Use for 2024Vinho/2024-03-11
-

[2024 Guide] Best Methods to Download Hulu Episodes OnlineCassie/2024-03-24
-
Netflix Download Limit: What it is & How to AvoidAugust/2024-02-18
-

5 Best Netflix Video Downloaders in 2024August/2024-02-18
-

Detailed Guide on How to Download Movies on Disney PlusVinho/2024-01-30
-

How to Import Bookmarks from Safari to ChromeCynthia/2018-01-04
-

3 Ways to Transfer Files from PC to iPhoneCynthia/2017-12-18
-
How to Get Photos from iPhone to MacCynthia/2017-12-18
-
3 Ways to Transfer Photos from iPhoto to iPhoneCynthia/2017-12-18
-

How to Airdrop from iPhone to MacCynthia/2017-12-07
-

How to Play MKV Files on PCDavid Brooks/2016-11-03
-

Best DVD player software – How to play DVD movies in WindowsDavid Brooks/2014-03-16
-

How to change region code of Blu-ray player software while playing back Blu-ray discsDavid Brooks/2013-08-20
-
How to Recover Photos from Samsung Galaxy S3?Dupont/2013-08-01
-
5 Free Methods to Import CSV/VCF Contacts to iPhone 5/4S/4/3GSAmanda/2013-07-14
-

How to Transfer Movies from Computer to iPad retinaWebber/2013-05-29
-

How to download PSY – GANGNAM STYLE video to computer, iPhone 5, Galaxy S IV, Lumia 920, Xperia Z, and other devices for totally freeDavid Brooks/2014-01-26
-
3 Methods to Transfer Photos from iPhone 5 to ComputerTony/2013-05-15
-

KMplayer vs. GOM Player – Find the better Windows media player software for youDavid Brooks/2014-03-16
-
How to Import Bookmarks from Safari to ChromeCynthia/2018-01-04
