Leawo Data Recovery for Mac User Guide
Leawo Data Recovery for Mac is capable of regaining data from lost, deleted, logical corrupted and formatted hard drive, USB drive, SD card, digital camera, mobile phone( iPhone not included ) , MP3, and MP4 player. Due to accidental file formatting and deleting, unpredictable virus attack and power failure, improper hardware and software operation, you may lost some important data files. But you don’t need to worry because this smart Data Recovery for Mac will help you recover deleted files quickly.
With this Mac Data Recovery, you are able to make File Recovery, Photo Recovery and Lost Partition Recovery according to your needs. For users' options, this data recovery for Mac is compatible with HFS+, FAT16/32, NTFS/NTFS5 file system volumes. With wizard user interface, users with no technical knowledge can recover data files of Mac hard drive and storage devices effortlessly.
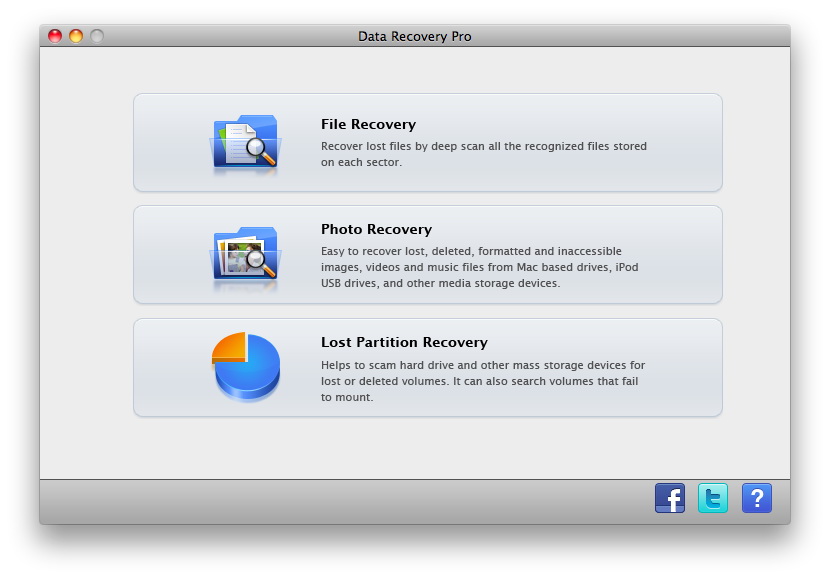
Run the Mac Data Recovery tool on your computer and you will see the main interface first. There are 3 data recovery modes for you to choose:
File Recovery: Recover lost files by deep scan all the recognized files stored on each sector.
Photo Recovery: Easy to recover lost, deleted, formatted and inaccessible images, videos and music files from Mac based drives, iPod, USB drives, and other media storage devices.
Lost Partition Recovery: Helps to scan hard drive and other mass storage devices for lost or deleted volumes. It can also search volumes that fail to mount.

File Recovery

Photo Recovery

Lost Partition Recovery
File Recovery
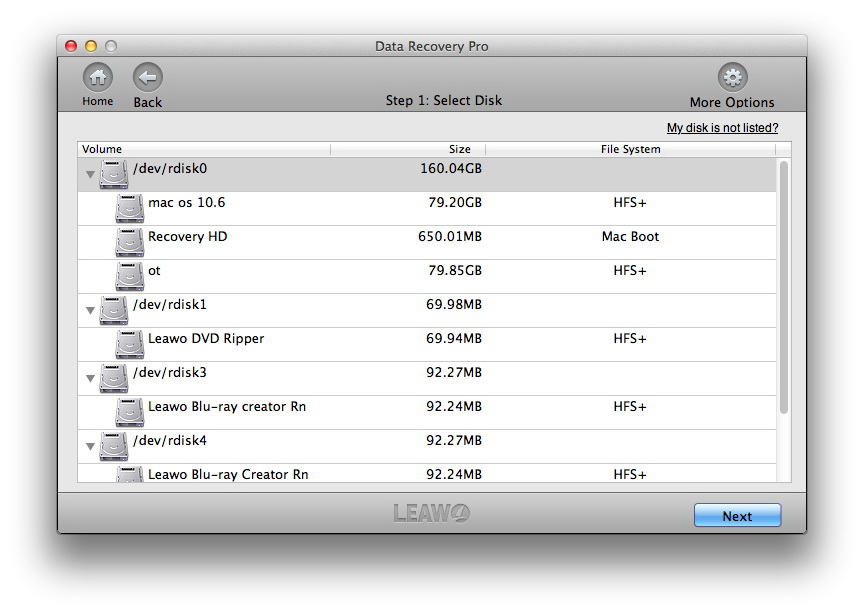
Step 1Select Disk
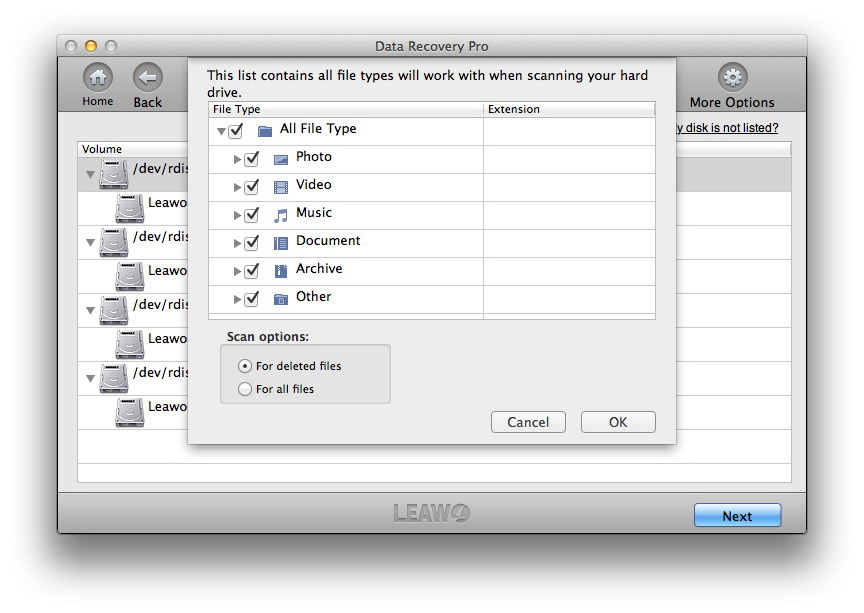
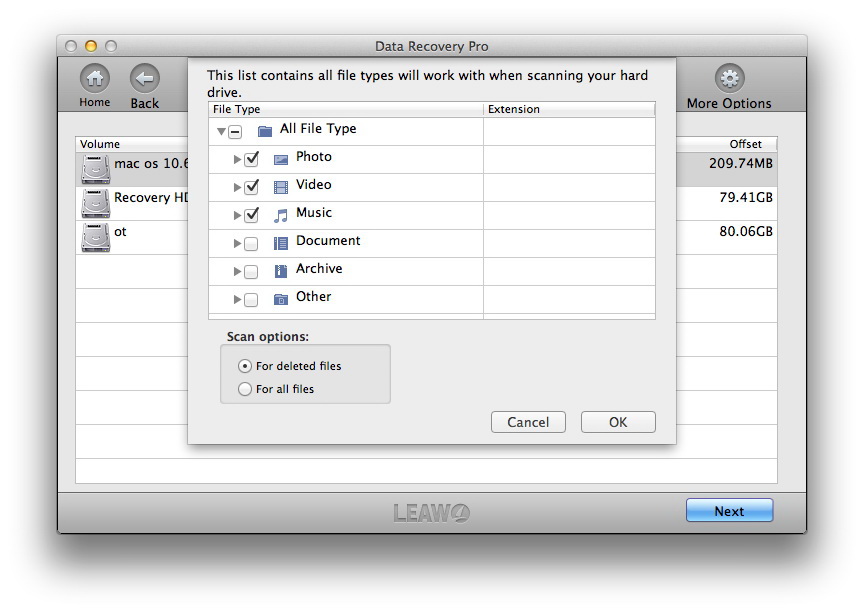
When you choose "File Recovery" mode, you will get into the following interface. Select the drive or volume you want to recover data from. Click on the "More Options" button on the top right corner to choose files for scanning. By default, all file types will be checked. Check "For deleted files" and it will scan only lost files, which will save you a lot time.
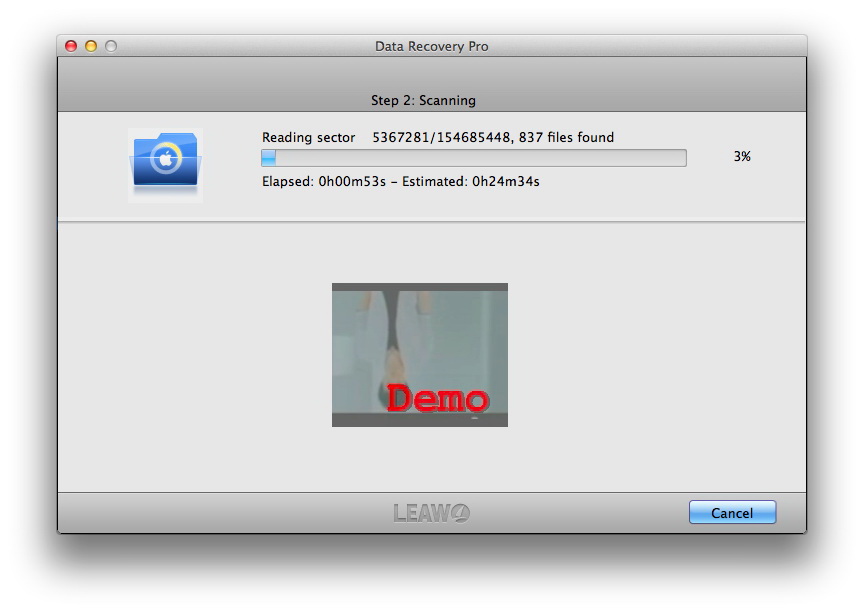
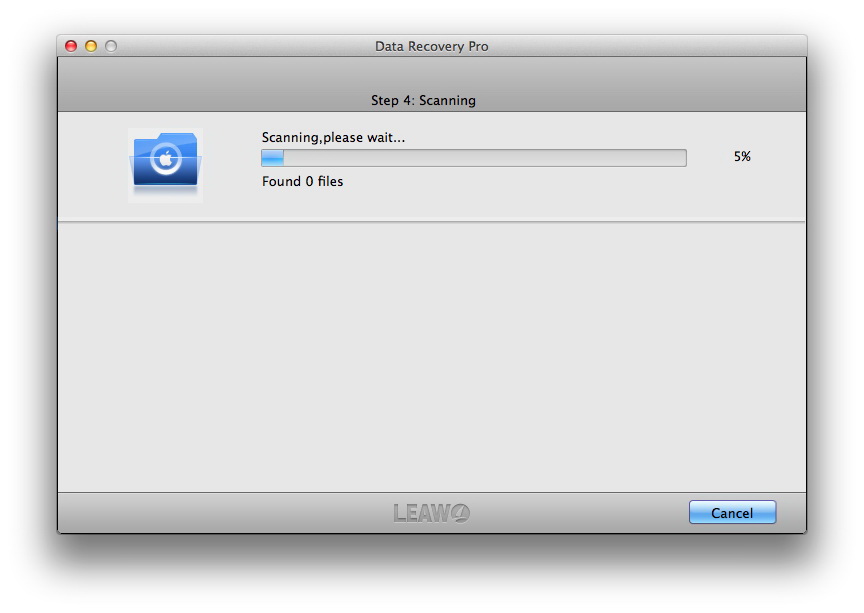
Step 2Scanning
Click on the "Next" button in the above step and switch to the file scanning interface. It will scan all files or deleted files (according to your setting above) intensively. You can have a preview on the image file when scanning.

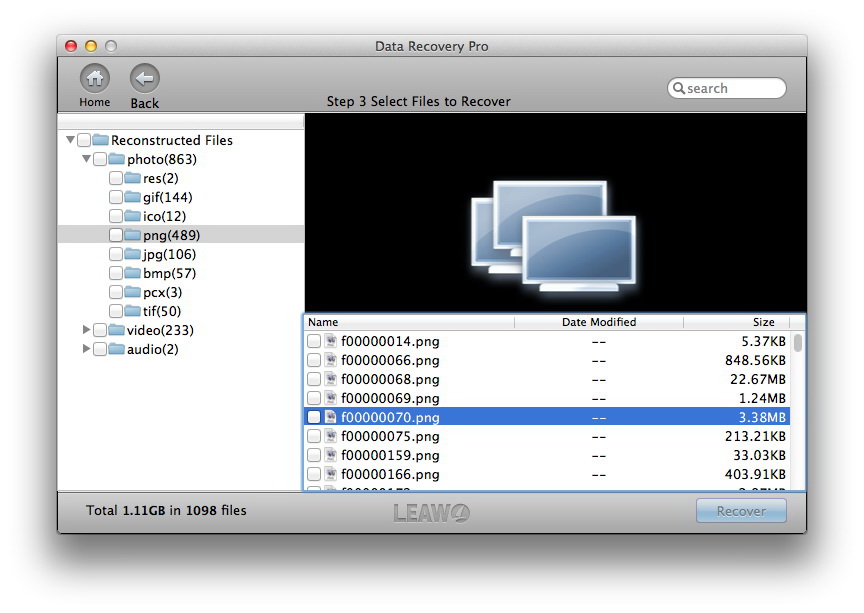
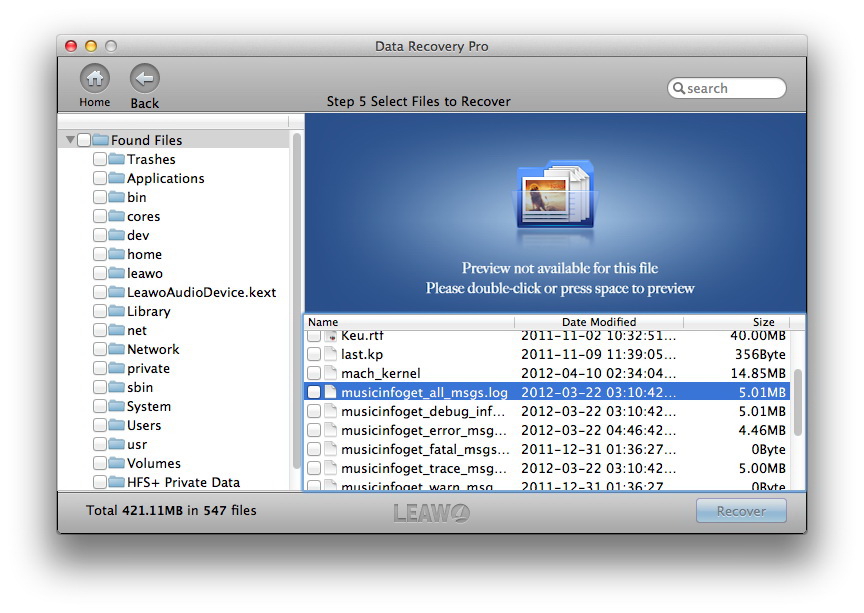
Step 3Recover
After scanning, all files found presenting on the left side of the software. Both Reconstructed Files and Found Files are accessible. You have the chance to preview the image or document file. Make a selection on the files you want to recover and click on the "Recover" button. Select a path on you Mac to save files and it is suggested that you save the recovered files on another drive in case of files be overwritten.
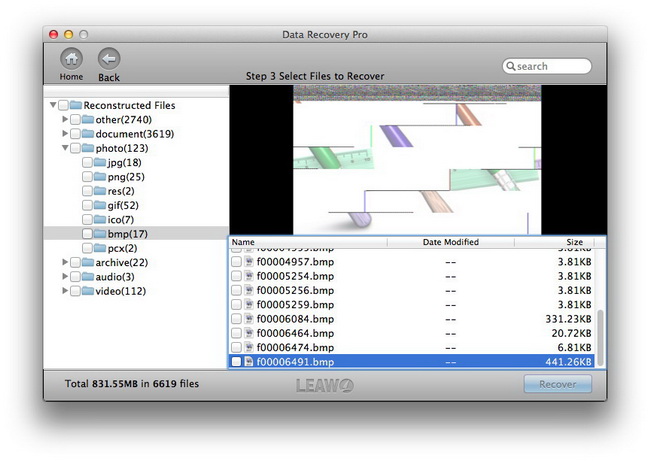
Reconstructed Files results will organize any found files by category and file type.
Found Files displays files from the Mac OS X file system in the original directory structures and file names if it’s intact.
Photo Recovery
Step 1Select Disk
Once you opt for "Photo Recovery" mode, you will enter the interface below. Choose the target drive or volume you want to carry out photo recovery. Then you can refer to "More Options" button on the top right corner to choose photos for scanning. When you check "For deleted files", the program will only scan the lost photos. When you check "For all files", the program will make scan all photos for you.
Step 2Scanning
By clicking on the "Next" button in the above step, you will enter to the following interface where you can scan the photo files.
Step 3Recover
You will have all photos found listed on the left side of the program. When selecting these photos you can also preview them. After selecting, just click on the "Recover" button. Choose a path for saving recovered photos and it is recommended that you save photos on another drive to avoid overwriting.
Lost Partition Recovery
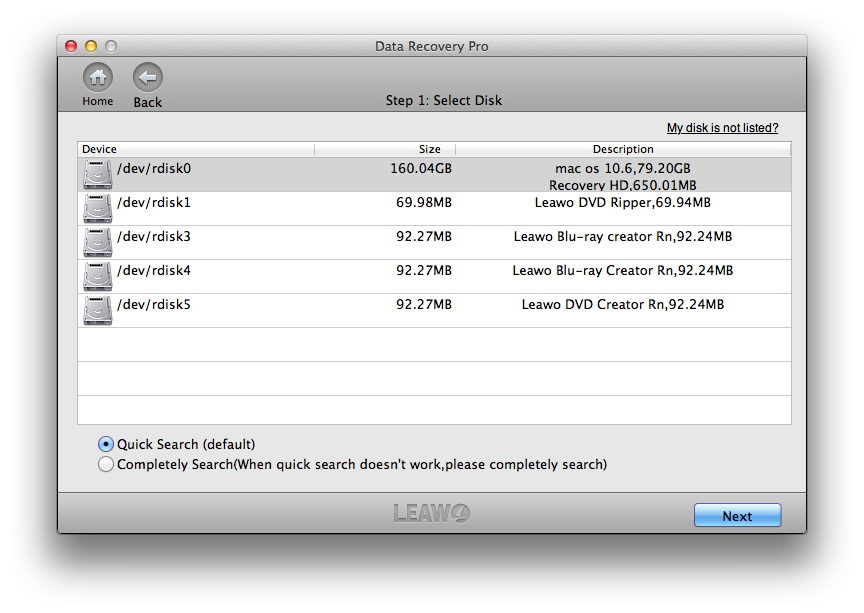
Step 1Select Disk
Select a disk to be analyzed by this data recovery software for Mac. Tab on "Next" button to head to the next step.
Step 2Analyse Cylinder
This program will analyse the cylinder on the disk you selected in last step.

Step 3Select Volume
After cylinder analysing, you will get volumes, then select the target volume for file scanning. Click on the "More Options" button and you can see a list containing all file types, pick up those you want for scanning. Scan all files by checking "For all files" and scan lost files only by checking "For deleted files".
Step 4Scanning
Click "Next" button in the above step and the software will make a thorough scanning of files on the selected volume.
Step 5Recover
All the files founded will be show in Found Files mode the same as the original directory. Choose files to be recovered and click on the "Recover" button. In order to ensure that no files will be overwritten, you had better save the recovered files on another drive.
![]()
Users Say
As consumers, I love companies offering solid product guarantees. It proves the company has faith in its product, and is making a solid effort to gain your trust.
-From Donald through our support center
Social Network
Join Our Newsletter: